Monday, February 26, 2007

Flurry of activity

We had a busy 33rd week.
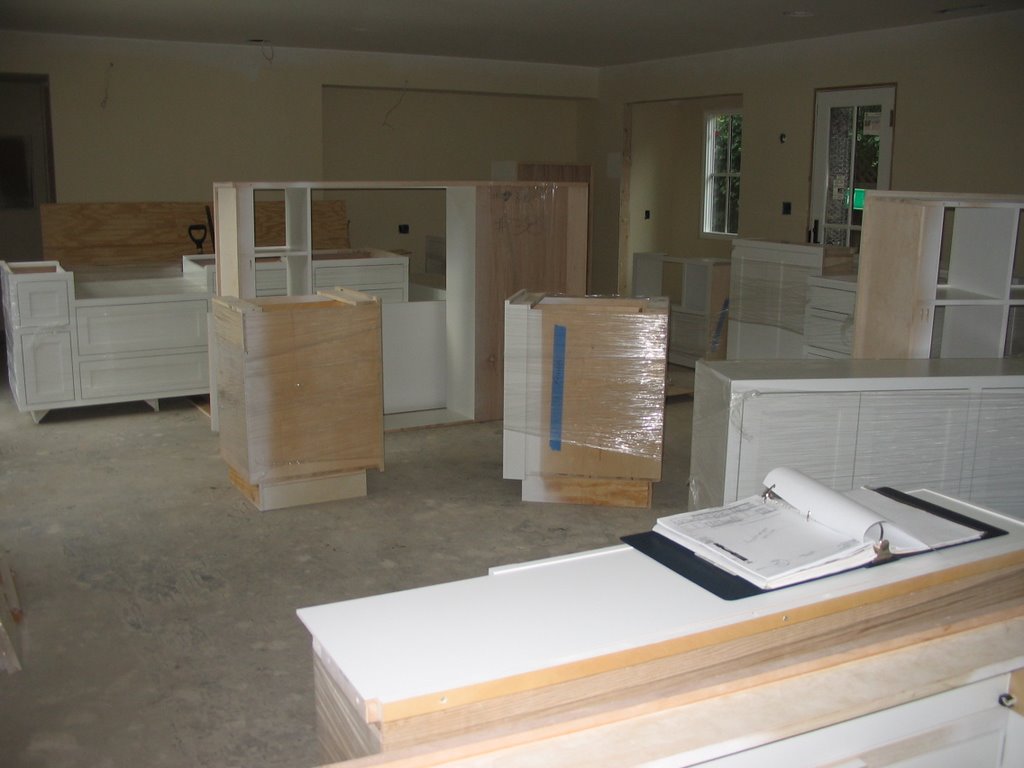
Cabinet installation started then quickly stalled when Mr. Xu found some of the cabinets were too big for their spaces. The Kids' BA vanity could not be slid in place because one of the side walls angled in. The kitchen corner cabs overlapped and would require one of the cabinets be cut more than an inch. Additionally, you wouldn't be able to pull out the drawers because they would run into the other drawer's handle.
He did still manage to install:
  • the entertainment center:
  • the double oven cab:
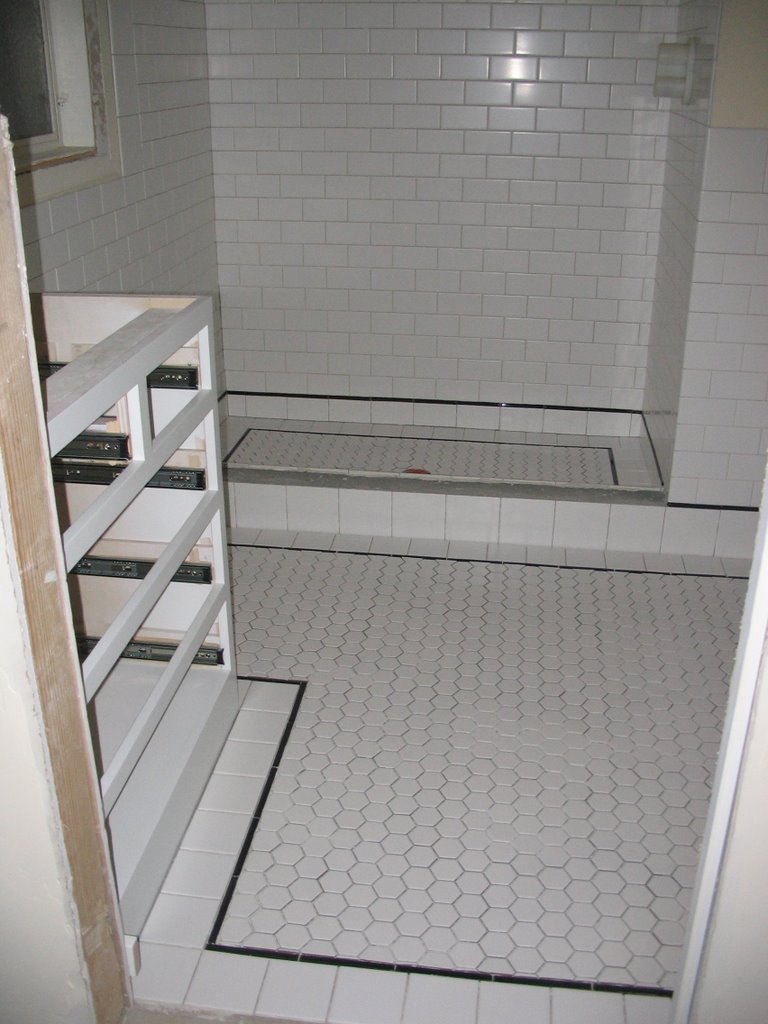
  • the laundry room shelves:
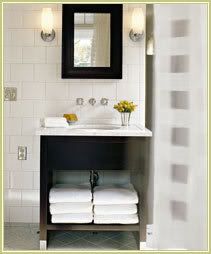
  • the Master BA cabs
and some upper kitchen cabinets:
With these upper cabs installed, we could now pinpoint the exact location for the hood duct and cut a hole thru the wall out to the exterior. I ran down to the heating supply place and bought a wall cap (specifically for stucco exteriors). Yes, this is all leading somewhere, namely, now we can stucco the exterior!

Other things this week:
  1. Picked up Kids' BA sink prior to marble templating
  2. Checked out engineered wood flooring samples
  3. Checked out recessed can trims (baffles vs. alzak, white vs. black, cone vs. gimbal)
  4. Extended Vac-Pan tubing under the oven cabinet
  5. Met with landscape architect
  6. Cleaned upstairs and downstairs office in preparation for solid hardwood flooring
  7. Installed 2 window trims
  8. Replaced broken stair riser (Man down! Tristan whacked his thumb with the hammer, but trooper that he is, kept on going!)

Sunday, February 25, 2007

Master BA Tile Design

One by one, we're making our way thru the bathrooms.
Today it's the Master BA.
Here's the inspiration photo from the gorgeous Meredith - Irongate Tile website:


And here's our bathroom to date:

The Iron Gate tile was out of our price range, so I substituted with the closest tiles I could find from Daltile. They were the Rittenhouse 3x6, the Permatones 2x2 hex mosaic, and from the Matte line, 4x4 for the floor border and 6x6 for the wainscot cap. I used two kinds of black liners. The floor uses a flat top liner and the wainscot base has a round top liner for some added dimension.

I'm using the same Duravit Happy D sink that we're using in the Guest BA, except we have a little more room in the Master BA, so this version has enough room for a deck mounted faucet (Kingston Brass Metropolitan, similar to one shown on sink).

Toilet is Toto Promenade:

All the bathroom photos that I liked for the Master BA are green, but I tried some green paint boards in our BA and I dunno. The light coming into the BA is very green casted because of all the shrubs right around the BA window. Or maybe I'm just not looking at the right green paint colors!

Friday, February 16, 2007

Free Closet Design

For every little thing that goes into a house, there are usually some rules or guidelines or standard methodology to follow.
I'd checked out Carpentry 3rd edition from the library and was reading Chapter 79 Application of Door Casings when surprise, surprise, it had a small bit about installing closet trim. It went into specific details such as using 1x5 stock for the shelf cleats, 1x12 for the shelf above the pole, hang the pole 64" from the floor and 12" away from the back wall. Gosh, I hadn't even thought about these kinds of details! Then while doing a search on pantry shelving (realizing maybe there are rules about this too!), I found these awesome closet design and installation articles.
It basically gave me all the standard dimensions for designing a closet, things like:

  • Install double poles at 84" and 42"
  • Put your very top shelf 84" off the floor and then you can install both double and single poles along one wall
  • Shoes need 7" high shelves
  • Cut shelf cleat 1/4" to 1/2" short from the front of the shelf, so it looks cleaner and neater

Great diagrams and photos too. We're going to be soooo organized! I hope :-)

Thursday, February 15, 2007

Get Ready to Trim!

Wow, I can't believe it. A problem with our trim order actually worked in our favor.
The millwork shop (The Moulding Co.) called to say they didn't have 20 foot lengths for our side casing, so could we please recalculate and revise the order.
Well, naturally since I have so much time on my hands, I'd actually been rethinking our order. I had just blindly assumed every door/opening could accomodate a 4 1/2" wide casing. But as I realized with the pantry door, sometimes you have switches that get in the way. Fortunately, I had my handy dandy Excel worksheet with me, so I raced thru the house checking every door and marking on the spreadsheet exactly what width casing worked.
I feel like I dodged a bullet! Now we won't have to rip (cut lengthwise) any of the side casing which is really hard to do cleanly especially since we don't have a table saw.
With President's Day, plus Ski Week, plus the two bookend weekends, I've got 9 days to work on trimming the doors. Plus I've got Tristan for 5 of those days! (Hope that's ok Tristan!?!?) Can we do 31 openings in that time???
Unfortunately, I've learned never to overestimate our abilities, as well as underestimate the potential problems.

Monday, February 12, 2007

More sad beadboard tales

This past weekend, Tristan and I kept working our way thru the beadboard. We actually took a break from the pantry project and instead spent Saturday installing beadboard on the ceiling above the windowseat. It was just a small 30" x 60" sheet, but it still took us 3 1/2 hours. The walls are never square, so we're forever scribing and sanding to get a good fit. The easiest part, and therefore the most fun part was cutting out the two holes for the recessed cans. Sounds tricky, but we just used a caulk gun and squeezed adhesive all around the recessed can opening, then pressed the beadboard panel up into place and transferred the adhesive "cutting line" onto the panel.


Sunday, we went back to tackling the pantry. You'd think after two and a half weekends of installing sheet panelling, we'd have run into most of the pitfalls. Anyways, this time we had problems fitting the panel because it was a bit warped, plus the subfloor was a bit higher on this side, so the panel would not lay flat and we couldn't get a good read on whether the sides and corners were fitting. It took us 3 hours to finish one wall. Hey, that's an improvement over Saturday's results. Only one wall left to go. I'm thinking maybe, pretty please, we can finish the pantry next weekend?

Tiling and Bathrooms - Guest BA

Meanwhile, since the cabinets were late, Mr. Xu and his co-worker kept on going with the tiling. I have to say I'm pretty tickled pink with how everything looks!

First, the Guest BA. Here's the inspiration photo (I think this was the sixth one):

Plain, big (6"x8") white tiles, laid out in a simple running bond pattern, with dark accents and a somewhat modern/contemporary feel (I'm going to add an Asian twist).

Here's our work in progress:

The floor will be a Carrara marble 1" hex:

The narrow 4' wide BA drove all the fixture choices - Geberit Darling wall-mounted toilet, Duravit Happy D sink and Jado Century wall-mounted faucet.

And finally some possible accent pieces:


Kitchen Cabinets

Finally, most of our cabinetry arrived, 1 1/2 weeks late. Our Great Room is a big storage facility now.The kitchen island is still missing along with some interior fittings, crown moulding, toekick boards. Hopefully those will arrive later this week.

Remember how I said in a previous post I just knew there would be problems even after going over every seeming minutiae? Well, I noticed several of the cabinet drawer fronts were not the right style. I wanted all slab fronts on the drawers, like this:

But some were framed, like this:

The cabinet company said to go ahead and install everything and they would be out to replace the drawer fronts.

We bought our cabinets from Niviya, a local custom cabinet shop. Our neighbors down the street recommended them. Certainly their price was great, especially for the inset style which was what we wanted. Other shops charged 30% extra for inset style, whereas Niviya only had a 5% upcharge. And the materials they used were very good given their prices. All solid wood or plywood, no particleboard; material thicknesses were all in the "best" category; full extension drawer slides. The factory lacquer finish looks great. (Reminder to myself: I should just double check the finish color against my sample board.)

We'll see how the installation goes!

Trimming the Pantry Door

Yahoo, I am PSYCHED! I trimmed my first door today. Well, technically only half, since I only cased the pantry side. The kitchen side is still unfinished.
But that means Tristan and I can finish the pantry beadboard next weekend.
So here's what I used:
- For the side casing, I bought 1x3 primed MDF from Lowes. I had to get narrower casing because there's a light switch in the way. I do not recommend MDF. Even though it cuts like butter and it actually flexes a bit to accomodate minor bumps, the stuff chips way too easily. We're using fingerjointed pine for the rest of the house.

- For the head casing, we had some leftover 5/4 x 6 pine from when Bill did a sample casing on the kitchen window.


Installing the actual casing is pretty straightforward. Just cut the side casings to length, line up with the reveal line and nail. Then lay the head casing on top and mark right in place (we had it extend 1/2" beyond the side casing on each side), cut and nail.
The hard part is the prep work. I spent most of my time scraping down the drywall and jamb so they would be flush with each other. Otherwise, the casing would not lie flat and you would have gaps on the sides. Other things working in our advantage:
  • We're painting all of our trim rather than staining. Paint and caulk hides a multitude of sins!
  • We're doing a Craftsman style trim with butt joints, so no miter cuts are needed.
Plus we've got this awesome Paslode cordless nail gun that nails and sets the nail beneath the surface automatically. Supposedly, you can fire 2-3 nails per second, although I haven't trained up to those speeds yet!

Sunday, February 04, 2007

Week #30: Jan 29 - Feb 4 Painting, Tiling, Beadboard

Painters worked all week priming & painting windows, painting all the ceilings before the kitchen cabs arrive.
Mr. Xu started tiling, yippee! I raced up the stairs the next morning to see the first tile go down in the house. This is the Penny Round Series tile from American Universal for the Kids' BA:

Made a trip up to SF to buy milkpaint, and plunk money down for a marble remnant at Fox Marble. Now I have to pick a fabricator!

The plumber finally sent someone out to fix the old kitchen drain leak. Hope that's the end of that problem.

Our weekend DIY project was installing beadboard in the pantry. After two days of work, we got two walls finished. I think Tristan was a little bit disappointed at the pace, but I tried to console him by reminding him that Mr. Xu and his co-worker barely got one wall tiled in a day. And after all, this was the first time we'd tackled anything like this. Finish work just takes time, especially if you want to do a good job. Our biggest problem was trying to fit a 4'x8' beadboard panel thru a 26" door opening. A lesson in spatial geometry!