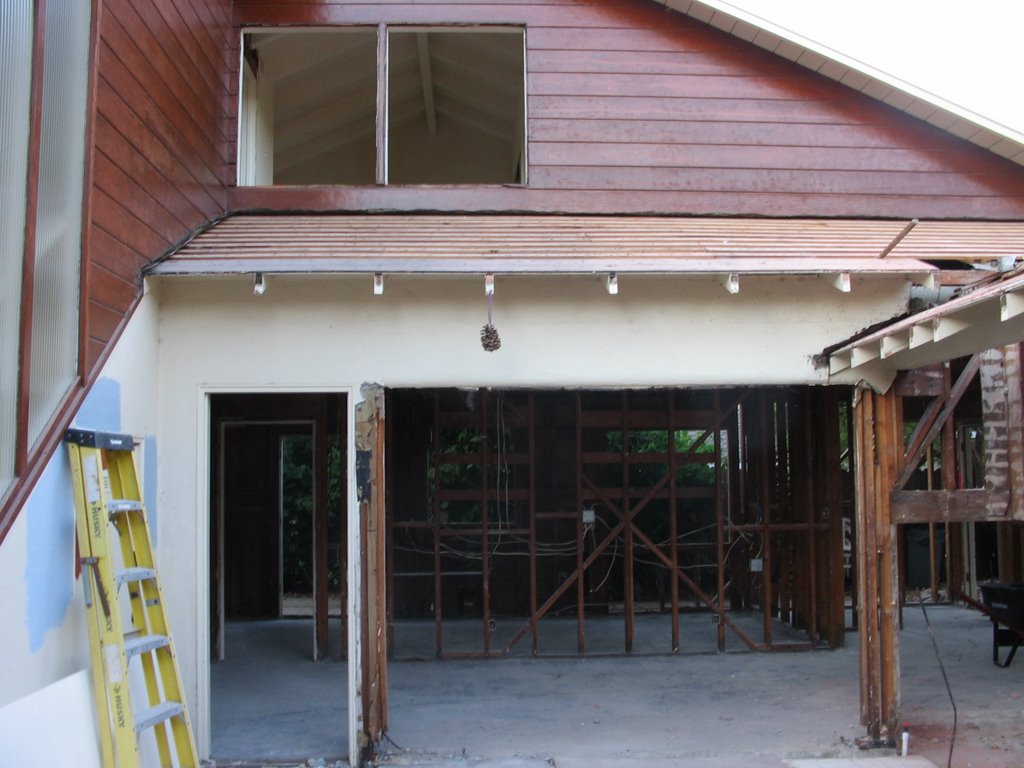
Monday, August 28, 2006

Framing the Laundry/Mudroom

I always love it when a lot of framing gets done. It's such tangible evidence of progress. Today, the framer worked on the new opening for the 10' wide sliding glass patio doors:

Before:After:

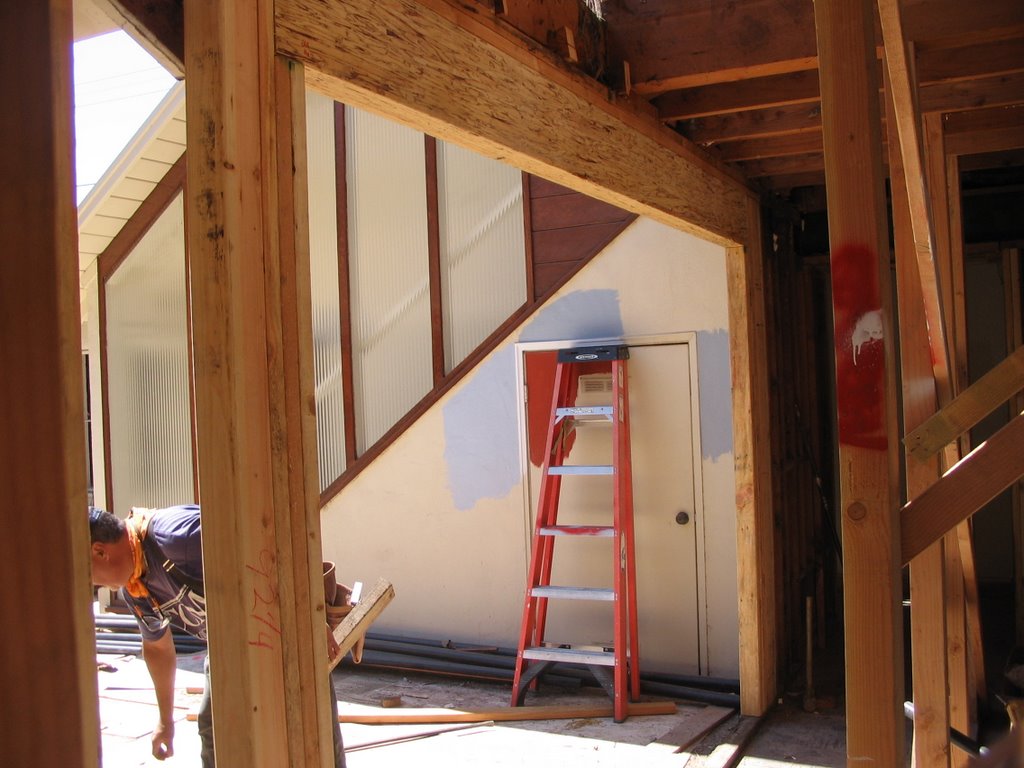
Next, he demoed the existing wall where the outdoor fireplace was and started removing the outside header and roof rafters (dry rot, unfortunately):

We also talked about all the little storage niches, which I think are going to be very fun, as well as functional. It's good to be on site to help make these decisions and it's good to have a responsive crew that wants to give you what you want! Here are some problems that we discussed today:
  1. Where to place gas fireplace: centered on the wall or off to one side
  2. How to frame around the fireplace to maximize storage niches
  3. Where to put Guest Bath storage niche
  4. Framing the Laundry/Mudroom window so there's enough room on sides for the trim
  5. Adding storage niche to Laundry/Mudroom
I suppose all of these things could be/should be on the plan, but let's face it. Things change. And it's kinda fun to design on the fly. Of course, you can't change anything structural! That would require refiling with the Building Dept.

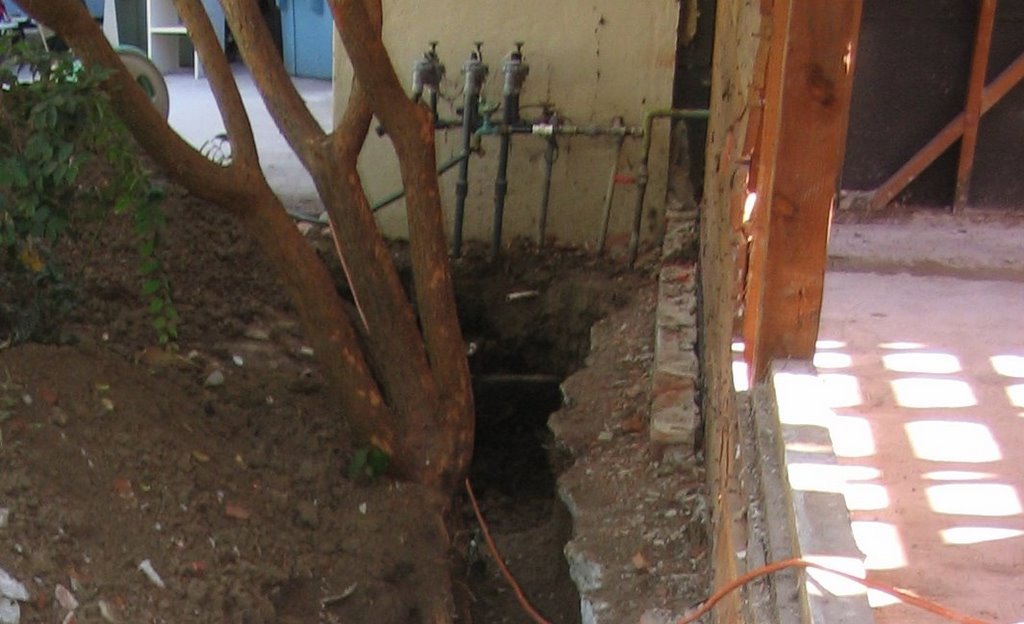
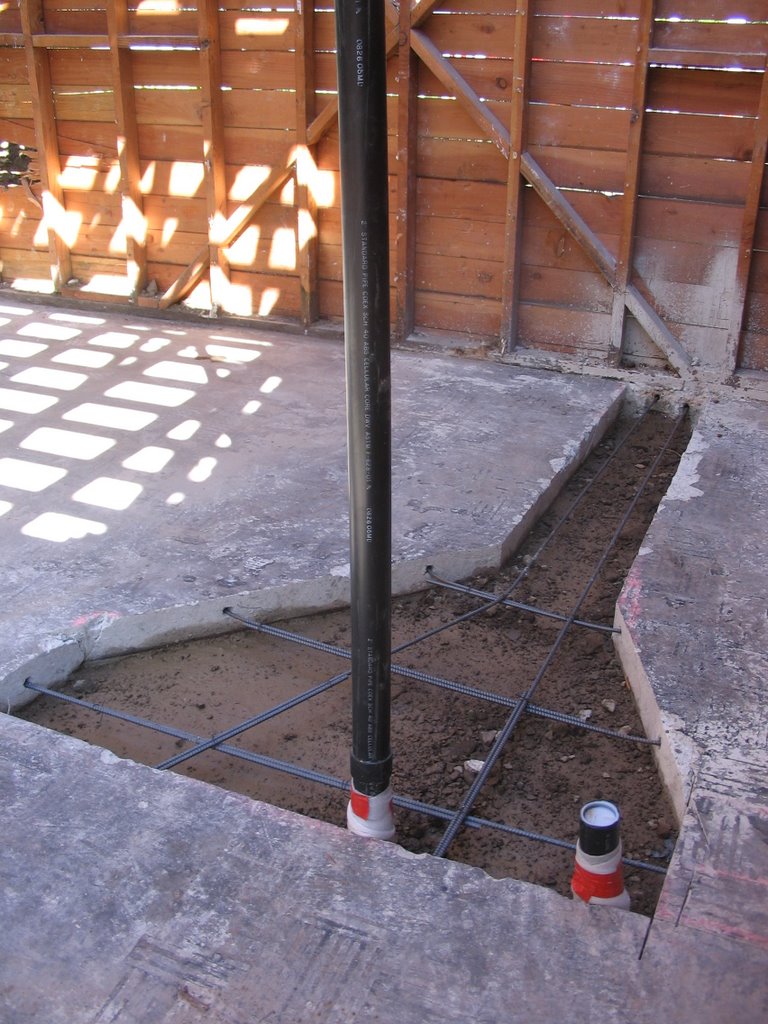
Speaking of giving you what you want, I mentioned to Ruben a leak in the non-working, rat's nest of a sprinkler system. I was going to borrow the Sawzall and cut away the leaky join plus all the other extraneous pipes. But he beat me to the punch. I came back from lunch with the kids and it was all taken care of.

Before, you can see the 3 sprinkler controls, plus additional pipes running into the garage and back out:
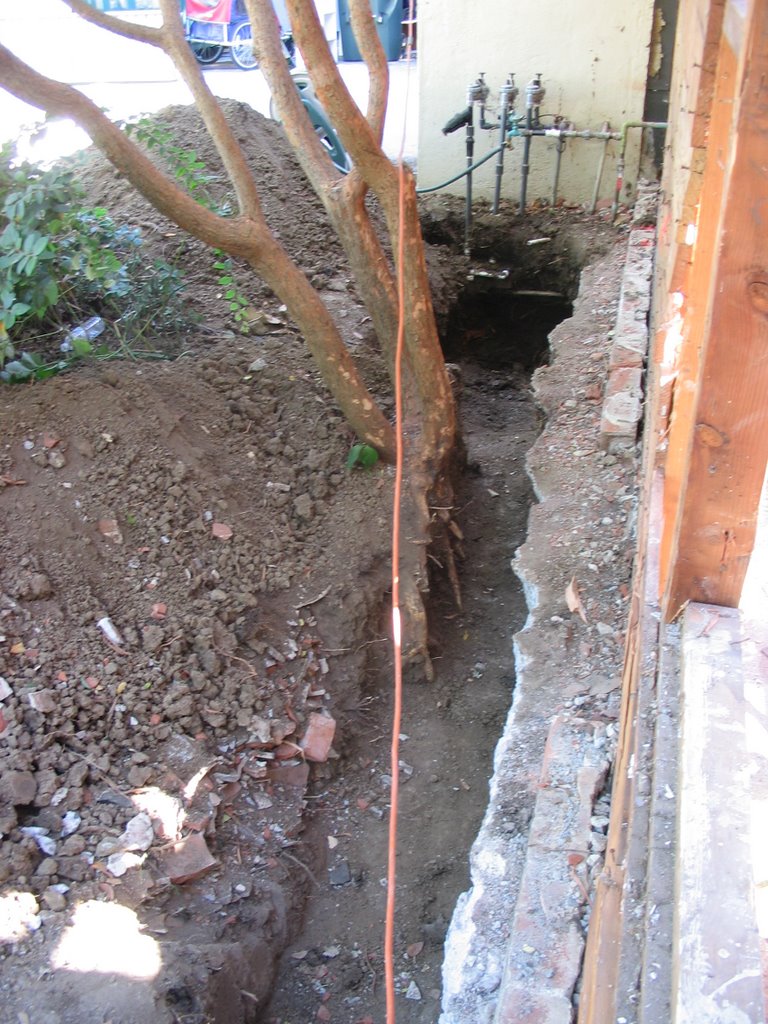
After: Now, the hose is connected directly to the hose bib. Should be fairly straightforward removing the remaining 3 pvc pipes sticking out.

Friday, August 25, 2006

Our Schedule

I haven't mentioned anything lately about how far behind we are. Mostly because I've been too scared/depressed/dejected to look at the schedule and figure it out. Well, can't be blind and ignorant forever. I plugged in all the dates and we've gone from 2 wks behind after demo to 3 1/2 wks behind after foundation pour. Next would be finishing framing and I figure that will put us back 5 wks from my original plan.

As bleak as this picture may look, here's some mitigating factors:

1) Did I mention my original plan calls for us to finish in 4 1/2 months? So if I tack on the 5 wks, that puts us at around 6 months, compare with 6 - 9 mos which is what most of the GCs who bid on this project estimated.

2) I still think we might be able to make back some of that time. Crazy optimist, I know, but in my original plan, I had all the rough-in work proceed in a linear fashion. In other words, plumbing didn't start until framing was finished. HVAC didn't start until plumbing was finished. And electrical didn't start until HVAC was finished. But I'm hoping I can get some parallel processing going.

3) Finally, we are fortunate our living situation is very flexible and there is no required date to leave (I don't think there is, is there, Mom and Dad?)

However, I am now toying with the idea of doing some finish work ourselves to keep our costs down. If we go that route, it will definitely take longer. So my other strategy is to find out how to get a Certificate of Occupancy. Maybe we can move in before all the work is done, then finish some of the work ourselves, afterwards.

Thursday, August 24, 2006

Little Things

A lot of little things happened today.

Our 10' w sliding glass patio door arrived at the glass shop. Unfortunately, we're not ready for it so I asked them to hold it at their facility. Our first Amsco order is also sitting at the warehouse ready to be delivered when I pull the trigger. Wouldn't you know it, the Marvin windows, which were the very first windows I ordered, are nowhere to be seen. But it's a moot point. We haven't even framed that wall, so I haven't even bothered to followup with the window guy to find out where they are.

Someone came by to take all the short pieces of rebar lying around (another Craigslist posting). He's going to use them as tent stakes at Burning Man!

Ruben and his crew took the day off. They're waiting for the concrete to cure a bit before they start working on the framing.

But the plumber's assistant showed up! I guess Keith felt guilty enough to send someone after I left 3 messages. Billy moved the tub upstairs, took out the old kitchen sink drain that was sticking out of the foundation, and finished the Master BA vent stack. It was fortunate Billy was at the house today because a truck showed up with the gas fireplace.

But the best thing that happened today was the big trench got filled. I was so sick and tired of seeing the piles of dirt on top of my poor plants. The cleanout had been fixed awhile ago, but they never got around to putting the dirt back. That was one of my requests to Keith. After Billy left, I spent another 1 1/2 hrs picking out mortar and brick chunks, pulling out tree root pieces, leveling the dirt and sweeping the brick. I think it looks so much better now. Here's before:


And afters:

Wednesday, August 23, 2006

Double Yahoo!

Today we poured the foundation. The sub with the pump came at 7:30am, followed by the sub with the concrete truck, followed by the sub who did the concrete finishing. Very specialized work!

Because we didn't have direct access for the concrete truck, we had to pump it from the street into the house via a big hose.

Then they moved the hose around and filled the forms.

I liked our neighbor's analogy to squeezing toothpaste out of a tube.

All of the communication between the pumper and the concrete truck guy was via hand signals since they were 40 ft apart with a cacaphony of equipment noises in between. The pumper would signal with his hands "How many yards left?" or "Add 2 gallons of water" or "Stop!".

The first concrete truck had 8 yards (One cubic yard of concrete is 3' X 3' X 3' in volume, or 27 cubic feet) and took about 1 1/2 hrs to pump into place. Then we had a short break of about 30 minutes while we waited for the second truck with 4.5 yards to finish the pour.

Bob caught a potentially big gaffe. In one corner, which is the front porch, the subfloor is pitched slightly to make sure water drains away from the house.

However, Bob noticed the concrete finisher was also pitching a part of the kitchen subfloor. No, no, no, no, no! There are many details in homebuilding that can be overlooked ("I wish the laundry plumbing wall was 3" to the left") or swept under the rug ("let's hide the portruding vent stack behind the cabinet toekick"), but having non-level floors in the house ain't one of them.

In the end, everything got worked out including lowering the level of the concrete for the front porch. (I didn't tell Ruben that I wanted to have a brick porch; I just assumed it was obvious since the walkway leading up to it is brick. Ruben thought the finished porch would be the concrete.) Lesson #1: Never assume, especially if your sub is blind and can't see the brick!

Anyhoo, the kids had some fun; they got to leave their handprint!

Monday, August 21, 2006

Week 6: YAHOO!!!

Pull out the champagne! Pop the corks! We passed our foundation inspection today!! Setback, forms and steel. I was a bit nervous about setback, because we're very close to the 6' limit. We - Ruben, the blind framer; Bob, my next door neighbor; and I - discussed our strategy if the inspector found any problems with the setback. Namely, the actual property line is on Bob's side of the fence.

When it came time for the inspection, the inspector very carefully looked at the plans and reviewed each area where new foundation was to be poured. He noted all the rebar caging, whether the rebar had been epoxied, where the anchor bolts were positioned. Everything looked great and he went over to the table, picked up our permit card and was ready to sign, when he muttered, "Oh, yeah. Setbacks." Gulp.

He headed back to the front of the house and eyeballed the setback (he didn't have a measuring tape), then using his feet, toe, heeled, toe, heeled the distance and proclaimed "Yeah, that looks good," and signed the card. I love the English measuring system!

Saturday, August 19, 2006

Bathroom Design

One of the hardest parts of this project has been to design the bathrooms.

For some reason, the kitchen was easy; manuevering thru all the kitchen choices was a piece of cake. But the bathrooms......I was stumped. Maybe it was because there were 3 bathrooms to design as opposed to 1 kitchen. Maybe it was because I was overwhelmed by all the tile choices. At any rate, I decided to hire an interior designer to get me thru my mental block.

It sorta worked and it sorta didn't.

It worked because even though I didn't apply his ideas verbatim, our back and forth dialogue helped give me enough confidence to make a choice and be satisfied with it. It didn't work because it was so darn expensive for what I got. I estimate only 30% of the total design cost went to actual face time with the designer. The rest, 70%, covered shopping trips and administrative fees. In my book, that's not a good enough payback.

So what I've come to realize is, interior design is really about what you like, not necessarily what you think others will like. Design for yourself, not for others. Pick stuff that will put a smile on your face every time you see it!

I know what I like. Unfortunately, I like a lot of different styles :-). So, for example, how do I decide between all these fantastic, beautiful tile designs (drool, drool)? Being the analytical engineer, I just apply a couple of criteria: cost; functionality/practicality; and yes, aesthetics does play into the equation so it must fit into our Modern Farmhouse theme. That helps to narrow my choices. Then once I've got 2-4 options, my new strategy is to ask friends! We have several friends who've remodeled and I admire their design sensibilities. They are perfect for bouncing ideas off of, which is all I really need. So, a big thank you to all my design savvy friends!

Guest Bath elements

Door Shopping

Tristan and I went over to the house today to take inventory of our salvaged doors. These are doors that we got free from friends and other remodelers. We needed to measure all the salvaged doors and match size, style and door swing to our door list.

After noting what we were missing, we went over to Whole House Building Supply with our shopping list. Boy do they have a lot of salvaged doors, and windows, and moulding and lumber - you get the picture. It's kinda hit or miss, sifting thru all the junk to find the right size door with the right panel and stick profile, correct door swing, pre-hung or not, upper glass lites, etc. We ended up getting 2 out of 7 on our shopping list. But since interior doors go in later, we can keep going back to see what additional new inventory comes in. Going to the salvage yard, we saved anywhere from 33 - 50% vs. buying a comparable new door.

Now the next step is to start thinking about door hardware. It's amazing, all the options and choices. Of course I had to check out a book from the library and read up on hinges, strikeplates, bored locksets, mortised locksets, pocket door locks.... never mind the doorknobs.

Just as an example, in our remodel we could possibly end up using 3 different types of hinges: butt hinges, invisible Soss hinges and double-acting hinges.

Another design element that I hope to incorporate involves an external sliding door. We're going to try and salvage our existing sliding garage door and use it inside the house as a "barn" door for the playroom.

Thursday, August 17, 2006

Foundation, Foundation, Foundation

Kinda like the real estate mantra: location, location, location.
Foundation, foundation, foundation: the most important thing to having a well-built, structurally sound house.
Today, the workers checked the foundation forms for squareness using the 3-4-5 rule. Of course, the forms were also built so that when the concrete is poured, it's level with the existing foundation.
Everything is so much more involved and detailed than I ever had a clue. The bottom of the footings ditch has to be clear of debris and loose dirt. So the workers had to take a big wet/dry vac and suck out all the dirt, rocks, etc. Then, the foundation pad must have a layer of gravel, followed by a vapor barrier (thick plastic), followed by a layer of builder's sand. Besides tying all the rebar, they also needed to hang anchor bolts prior to the pour.
Everything gets inspected at this point and if the inspector signs off, then we can call in the concrete trucks to pour the foundation.

Tuesday, August 15, 2006

Waste lines almost finished

Laundry Rm waste line from left to right: Washer drain, w/trap, connected to drain under slab leading to main sewer line outside of the house; vent stack (2nd vertical pipe); utility sink drain and vent (ties into other vent stack above ceiling).

The plumber got most of the waste lines installed yesterday. The laundry room is shown above and the Guest BA is below. Have to talk to the plumber about the sink drain pipe.. Since I have a console sink, there's no cabinet to hide the pipes. I don't want black ABS pipes showing!

Monday, August 14, 2006

Day 35 - Aug 14 Patience is a virtue

We've been at it for 5 weeks now. Of course, I'd hoped we'd be further along, but I'm slowly learning to adopt a more pragmatic approach. That is, surprises are to be expected when renovating an older house. The key to success then is to have a positive attitude and approach each "surprise" as an opportunity to exercise creative problem-solving skills!

So far, our team has worked together well to resolve the Master BA issue. We went from having the vent stack union sticking out 2" above the concrete subfloor:

to this, where the union is now below the finished subfloor:

This middle ground solution required us to jackhammer some of the concrete, but not as much as the 3' down originally discussed. By getting the 4" diameter union below the subfloor, the framer has enough room for his bottom plate, plus I get my pocket door where I want it. Plus, hopefully, my bathroom storage cabinet won't have to stick out so much anymore to cover up the offending vent stack.

We also had the special (read EXPENSIVE) inspector come out this morning to watch the epoxy procedure. A crew member filled each hole with a special (read EXPENSIVE) epoxy delivered via a special (read EXPENSIVE) gun:

Then another crew member inserted the rebar and gave it several good sledgehammer whacks to make sure it went all the way into the hole:

You can see how much rebar we're putting into the foundation footing. If anyone ever wanted to remodel in the future, it would be a nightmare getting this foundation out.

Our next steps are to finish tying the rebar, then build the forms for the foundation. Hopefully, we can get another inspection on Friday and then pour foundation on Mon or Tues of next week.

Friday, August 11, 2006

Day 32 Friday, 8/11

As GC, my glamorous jobs include sweeper, garbage collector and gopher.

Today, I ran an errand to the plumbing supply house. We're still having problems with the Master BA vent stack. Still trying to get the 4" stack below the concrete subfloor and have it reduced to a 2" dia vent above the subfloor. This way we can fit it into a 2x4 framed wall instead of a 2x6 wall.

The plumber keeps saying it can't be done w/o having to break out all the concrete and dig down 3 feet, because of all the unions. So, last night I found a photo I took of the section, before it got covered up with dirt and concrete.

I took the photo to the plumbing supply store and asked them it they thought it would be possible. The guy thought we might be able to do it, so I think it's worth chipping out some of the concrete, getting down to the first hub, and seeing if we can't cut off more of the 4" pipe before attaching the reducing hub. It will be very close.

If it doesn't work, then I'll have to have a 21" deep bathroom cabinet with a notched toekick to hide the vent stack.

Wednesday, August 09, 2006

Day 30 - Wed, Aug 9

Foundation work now looks like an archeological dig. The perimeter has to have an extra wide and thick footing. So while the rest of the area is dug to a 12 inch depth, the footing is I think something like 20 inch deep. Remember, we're building to commercial code. But apparently, it's not uncommon for structural engineers to over engineer. Our neighbors also have some of the same issues re their structural plans. Isn't it reassuring to know we're not alone.

The framer hired two laborers to help remove dirt and haul it to the dump. We don't have a lot of room in the front yard, so we have to make frequent trips to the dump to keep the yard somewhat tidy. Plus, I don't want my remaining plants to be killed.

The plumber finally came today after being a no show yesterday (emergency call). He and his assistant were there for approx. 6 hrs. After taking away time for lunch, phone calls and trips to the plumbing supply store, maybe they got in 8-9 manhours. They had to spend some of that time redoing previous work, some of it not entirely their fault.

In the Master BA, the originally chalked walls were not square. After squaring the walls, the stack ended up being outside the walls. So the vent stack had to be elbowed 45 deg to bring it back inside the wall.
In the Guest BA, the underground rough-in for the wall-mounted toilet was off by maybe 1/2". It was centered in the 2x6 framed wall, but it needed to be mounted more towards the back. You can see where they had to chip away some of the concrete in order to move the drain pipe back fractions of an inch.

But I'm so excited to see the wall-mounted toilet roughed-in!

Monday, August 07, 2006

Day 26-28 Sat - Mon 8/5 - 8/7

Let's see if I can even remember what happened.....

Saturday, framing and digging for foundation. Progressing slowly. I swept and broom cleaned the entire downstairs. Finally broke down and bought a push broom and huge shovel/scoop which made the task much easier. What a difference it made cleaning up all the sawdust, nails, debris on the floor. Still wouldn't eat off the floor, of course!

Sunday, more of the same (technically, not supposed to work on Sundays; hopefully no one complained, certainly not our immediate neighbors). Tristan took a lot of stuff to the dump - old plumbing pipes, 2x4s, 2x6s, scrap lumber. Had a couple of "Craigslist people" show up and salvage some of the scrap lumber. Hope someone will take the growing pile of dirt!

Monday, only foundation work today. Frustrating aspects: Framer's workers don't show up or show up late; work that's done is not obvious and so it seems nothing gets done for the day.

I did get the HVAC sub to come today. He talked things over with the framer and we came up with a solution for moving the upstairs furnace so we could raise the ceiling to 8 ft over the expanded bathroom. The more we talked, the better the solution got. Instead of lifting the furnace up, we'll just slide it over. Instead of framing a new chase for the cold air return, we'll just vent if from the ceiling.

Another problem that got creatively solved: In the Master BA, cut out the toekick on the storage cabinet and use the cabinet to hide the extra wide vent pipe. Otherwise, we'd need to break into the newly poured concrete (uh, just call that a miscommunication between the plumber and framer).

Parallams got delivered today; fireplace installer is coming out Thurs to review how to vent the gas fireplace.

Oh, oh, oh, before I forget, I need to pack up the car tonight with all the plumbing rough-in parts: shower valves, in-wall tank and carrier for toilet, wall-mounted faucet valves. The plumber is supposed to come tomorrow and start rough-in. I'm really hoping a lot of plumbing work gets done tomorrow. I would love to see the Kelly trap fixed so we can fill in the trench.

Friday, August 04, 2006

Day 25 Fri 8/4 Foundation and Framing

More deliveries: rebar, concrete blocks, drill bits, other stuff all related to foundation work.

They've started framing the Guest BA plumbing wall. We're finally starting to reconstruct as opposed to deconstruct.

UPS delivered the Duravit wall hung toilet today. No one was home, so they just left the 3 packages at the doorstep. All the internet stores tell you to examine the packages as they are delivered, and indicate any damages before the delivery guy leaves. I have yet to do that. How can you, when they ring and run regardless of whether you're home or not. To date, I haven't had any problems with damaged merchandise, but today I examined the toilet and there's a small chip at the very bottom. Good news, I think it'll be very hard to detect especially after grouting, so I'm not going to bother returning.

More foundation questions. Had to call the architect and have him review a foundation detail with the structural engineer. I can't wait to get all these "structural" issues behind us. It really seems like all of the foundation/structural stuff for our house is WAY overengineered. I keep thinking once the framing is done, it'll be all down hill. The reality is, of course, there's sure to be new "surprises" to keep the project interesting :-).

Thursday, August 03, 2006

Day 24 Thurs 8/3


Lots of cars, vans and trucks today! You know what that means :-)

The underground plumbing and electrical got finished today when they poured the concrete to fill in the holes. At first they talked about pumping the concrete from the street to the house. But the actual quantity needed was so small, they just wheelbarrowed it.

Foundation work started. They're measuring and building the forms. The wood they're using is from HD, ie it doesn't have to be good quality.

In comparison, the wood we're using for framing came from a lumberyard, Golden State Lumber, in Newark. That got delivered today. It even had my name spray painted on the side! I got price quotes from Golden State, Pine Cone in Sunnyvale and Minton's in Mt. View (listed in order from $ to $$$).

I'm sure glad I swept the driveway before the lumber delivery. Look at all the dust I collected and it weighed a ton:
The lumber order was literally "dropped" onto the driveway, creating a huge dust cloud, even after all my sweeping.

Day 22 Tues 8/1

We passed our "steel in slab" inspection this morning.
That means we'll be ready to pour concrete tomorrow morning and fill in the holes.

By contrast, the inspector this time was pleasant as can be and when asked for a business card, went out to his car to get one.

I didn't think anything else would happen today, but the framer came and measured for foundation form materials and purchased those at HD.

I can see why projects take so long. There's so much in-between time. Our inspection passed this morning, but we won't be able to pour the concrete until tomorrow. So that's 24 hours of no progress.

Tuesday, August 01, 2006

How to Order Windows

I cannot begin to count the number of hours I've spent researching/ordering windows.

First and foremost, if you do not want to spend a lot of hours on windows, make sure your architect specifies every single detail re every single window in your plan......brand; specific line in the brand; style (single hung, double hung, casement, awning); fixed or operating glass; grid size and pattern; jamb depth; colors; whether glass must be tempered; whether window must meet egress; brickmould or add your own trim (and what does the trim look like?).

We went the bare bones route with our architect. Most of the finish details were left to us to specify. The disadvantages. as noted above, largely involved time. The advantages included keeping costs in check by knowing exactly how much window we needed (fiberglass is overkill in our climate) and avoiding certain expensive types of windows such as French casements.

I ended up placing orders with 3 different window manufacturers, kinda unorthodox. But by doing so, I was able to reduce my window costs 35% from my initial price quote. I was even able to use a new Marvin product, a venting picture window. The whole window pops out and has a screen around all four sides. I put two of them in the front of the house. These turned out to be cheaper than the Jeld-wen French casements I initally spec'd.

Adeus, Tchau, Demo Crew!

The demo contractor has left the house, literally and finally. He finished jack hammering on Friday and came back on Monday and hauled all the debris away. Final costs for demolition ran 10% over budget, mostly due to the large amount of concrete that none of us anticipated. Plus having to rent the air compressor jack hammer. I only thought it fair that we pay for those extras.
Looking at my project schedule, I see demolition was scheduled for 5 days. Actual length.....13 days. Hmmm, a fun challenge trying to make that up somewhere.