Friday, January 26, 2007
Week #29: More design fun
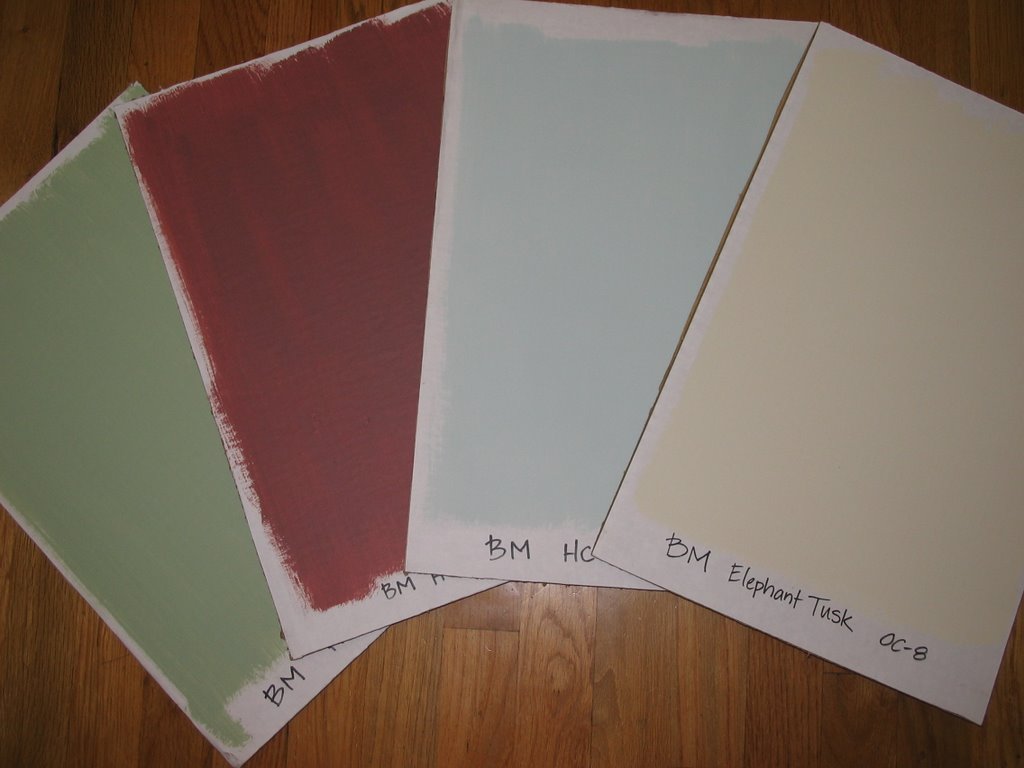
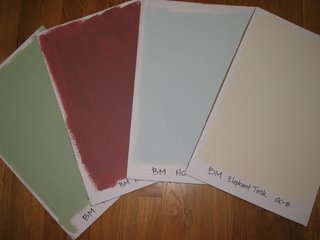
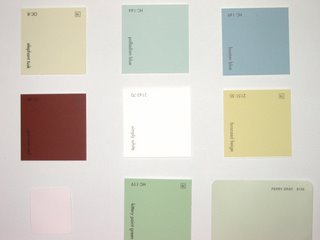
The sample paint pots I ordered from Belcaro (now known as Guiry's) arrived! I'm going to paint them up on poster boards so I can move them around from room to room and wall to wall.
Week #29: Jan 22 -28 Texturing Drywall
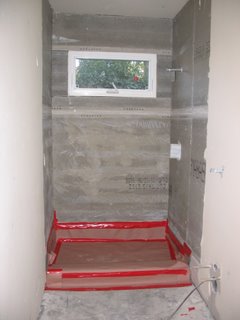
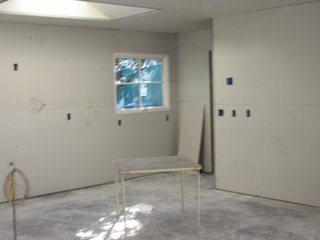
The drywall sub continued texturing & sanding in order to have ceiling and walls ready for priming on Friday. The cold weather slowed down the drying process; you can see the darker areas are not completely dry.
 Bought red rosin paper at HD and covered shower floors to protect from all the drywall sanding. Can use this stuff later over the installed hardwood floors.
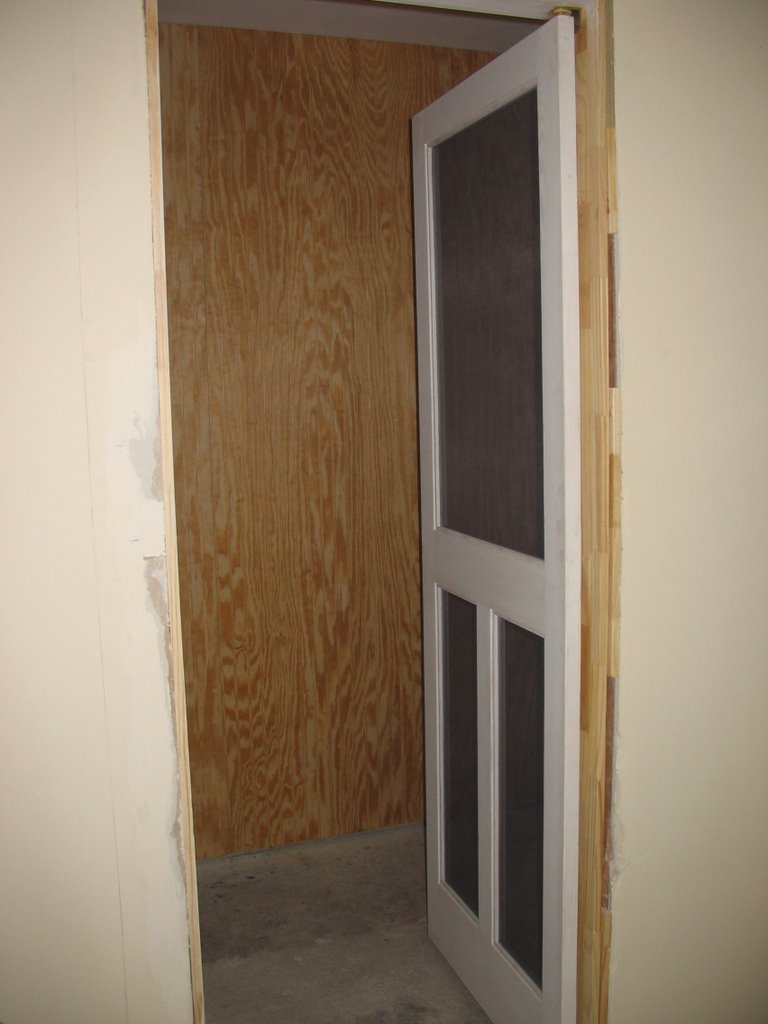
 The pantry screen door's ready, but still having problems finding the right hinges. One pair suggested by a door company is $130!!
Down to the wire, picked a painter on Wed so we can start priming on Friday!
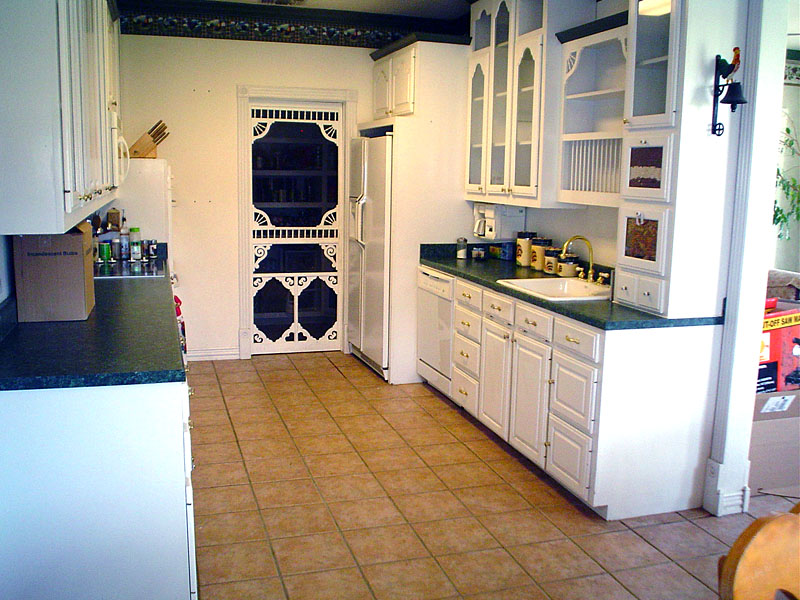
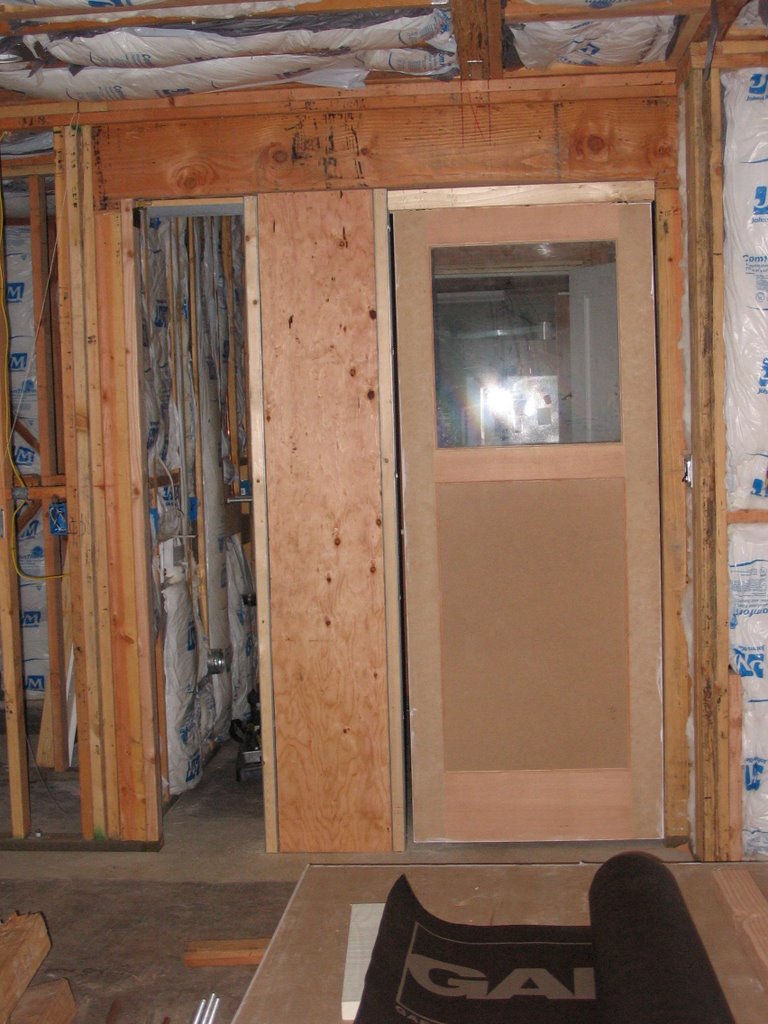
Found someone to hang the interior doors, another handyman who does a lot of work for a friend. Kinda felt like I left some money on the table there. Didn't do as thorough a job vetting out the best contractor for this job. But by Sunday late afternoon, all the interior doors were installed. Plus, I found cafe hinges ($7/pair at OSH) for the screen door instead of the aforementioned $130 double action spring-loaded hinges. Check it out; they work perfectly!
Swing IN:

Swing OUT: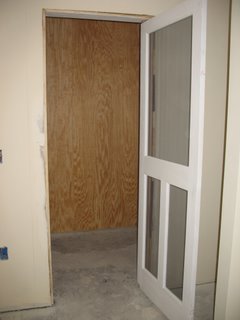 Psyched to the moon too that Mr. Xu is going to tile and install cabinets for us!!! He did remodels for my parents and the house in Newark. Been calling him since November to check on his availability and to see if he'd do our job, but he always seemed so non-committal. I was sooo worried he was giving us the brush off; figured the commute wasn't worth it. But today, I called him again to see if he could start tiling next week and he said yes! And an enthusiatic yes at that. The timing worked out great. His big job up in SF is finishing up this week, so he's all ours after that!!
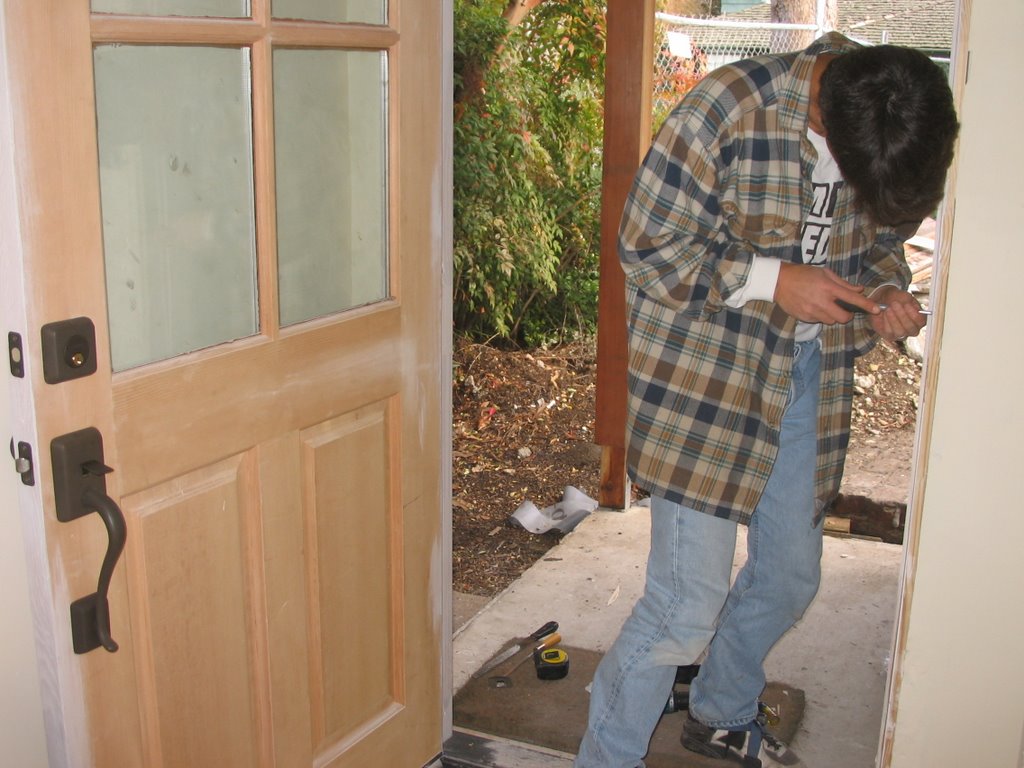
Tristan and I worked on installing the front door hardware. Pretty simple and straightforward, except at the end when we closed the door to test the deadbolt and latch and found the holes in the door jamb didn't line up. Arghhh, Tristan had to chisel out the hole a bit.

 Bought red rosin paper at HD and covered shower floors to protect from all the drywall sanding. Can use this stuff later over the installed hardwood floors.
 The pantry screen door's ready, but still having problems finding the right hinges. One pair suggested by a door company is $130!!
Down to the wire, picked a painter on Wed so we can start priming on Friday!
Found someone to hang the interior doors, another handyman who does a lot of work for a friend. Kinda felt like I left some money on the table there. Didn't do as thorough a job vetting out the best contractor for this job. But by Sunday late afternoon, all the interior doors were installed. Plus, I found cafe hinges ($7/pair at OSH) for the screen door instead of the aforementioned $130 double action spring-loaded hinges. Check it out; they work perfectly!
Swing IN:
Swing OUT:
 Psyched to the moon too that Mr. Xu is going to tile and install cabinets for us!!! He did remodels for my parents and the house in Newark. Been calling him since November to check on his availability and to see if he'd do our job, but he always seemed so non-committal. I was sooo worried he was giving us the brush off; figured the commute wasn't worth it. But today, I called him again to see if he could start tiling next week and he said yes! And an enthusiatic yes at that. The timing worked out great. His big job up in SF is finishing up this week, so he's all ours after that!!
Tristan and I worked on installing the front door hardware. Pretty simple and straightforward, except at the end when we closed the door to test the deadbolt and latch and found the holes in the door jamb didn't line up. Arghhh, Tristan had to chisel out the hole a bit.
Week #28: Jan 15 - 21 Shower Pan
I decided not to hire the hotmoppers since they couldn't prefloat our floor (drain is not directly in center of shower space). Since I had to hire someone else to prefloat the floors, I decided to just have that person do the entire shower floor up to tiling. That meant installing a vinyl liner and then putting a mortar bed on top of that as well as floating the wall to match the cement board. Next time, I can avoid all this hassle by installing a premade vinyl pan, but I really do like the look of a tiled shower floor :-)
Here's the process:
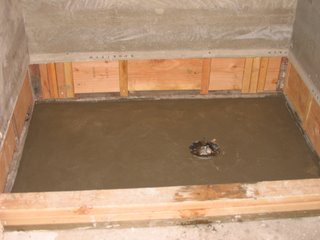
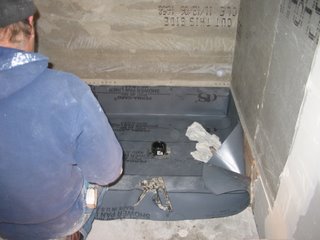
First, the floor is presloped towards the drain by building a thin mortar bed; code requires 1/4" drop for every 12" run. The vinyl liner will sit on top of this. This insures water that gets past the tile and mortar will hit the vinyl liner and flow towards the drain, rather than just standing and growing mold and mildew.
 Next comes the vinyl liner - cut to size and folded:
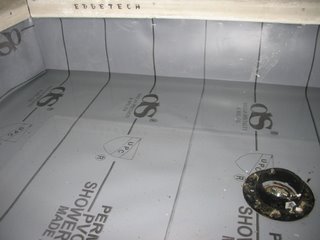
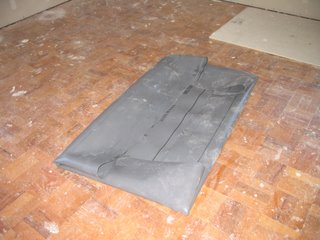 then placed on top of the preslope:
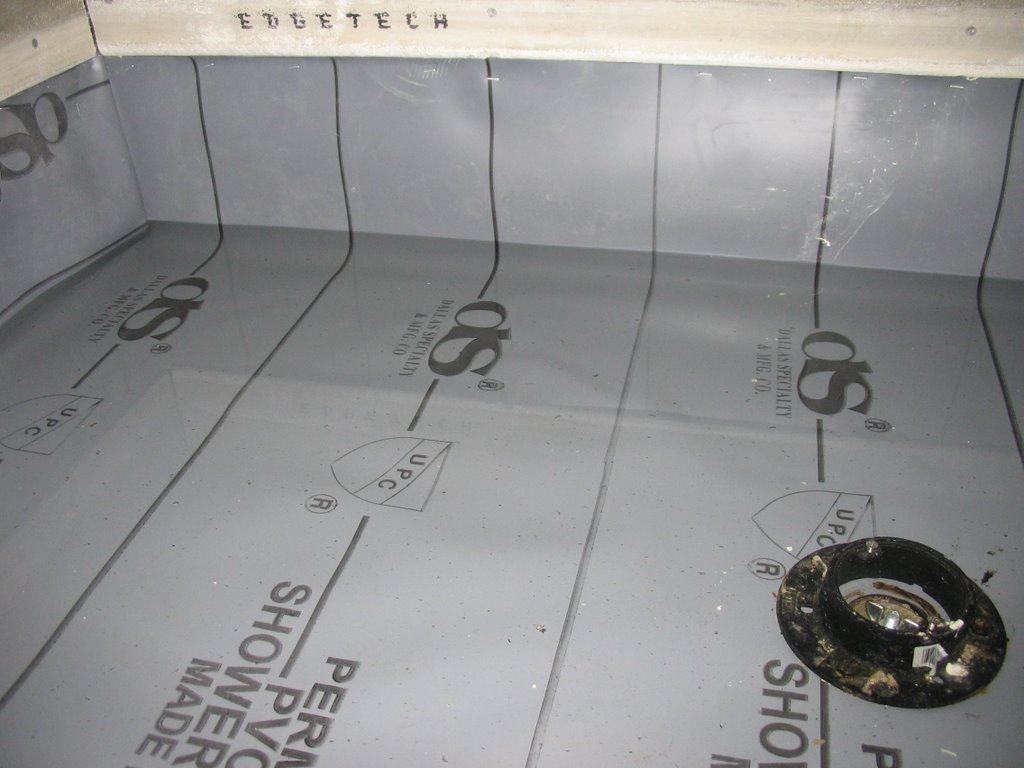
A two part drain cap is placed over the vinyl. The cap has weep holes which allows water in the liner pan to drain out. A test plug is dropped into the drain so the pan can be filled with water for inspection.
 The inspector will want to see the liner hold water as well as seeing the water drain thru the weep holes.
After passing the shower inspection, the mud guy came back and finished the job with a 2nd thicker bed of mortar:

Now the shower's ready for tiling!
Here's the process:
First, the floor is presloped towards the drain by building a thin mortar bed; code requires 1/4" drop for every 12" run. The vinyl liner will sit on top of this. This insures water that gets past the tile and mortar will hit the vinyl liner and flow towards the drain, rather than just standing and growing mold and mildew.
 Next comes the vinyl liner - cut to size and folded:
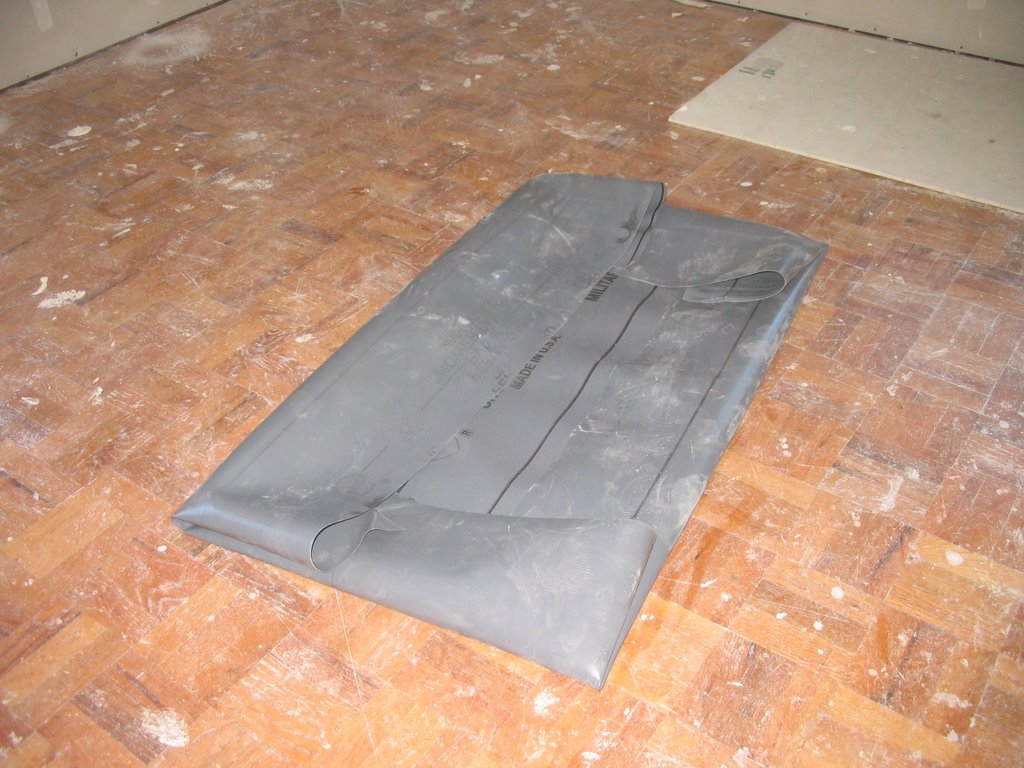 then placed on top of the preslope:
A two part drain cap is placed over the vinyl. The cap has weep holes which allows water in the liner pan to drain out. A test plug is dropped into the drain so the pan can be filled with water for inspection.
 The inspector will want to see the liner hold water as well as seeing the water drain thru the weep holes.
After passing the shower inspection, the mud guy came back and finished the job with a 2nd thicker bed of mortar:

Now the shower's ready for tiling!
Thursday, January 25, 2007
Week #27: Design Stuff = Fun Stuff
Now that the drywall is going up, we're switching gears and concentrating on all the finish work, i.e. choosing all the fun design stuff!!!
My friend Kathryn came down from SF and helped me choose paint colors. It is so much easier and of course so much more fun to have another person to bounce ideas off of. Oh, and did I mention Kathryn has really good design sense! Here's our initial stab. A lot of Benjamin Moore Historical colors, more muted and grayed, since we're going for a farmhouse style.
 I also went up to M. Teixiera and picked out a soapstone slab for our kitchen countertops and fireplace surround. That only took one hour! Then drove down the road to Fox Marble
to check out Carrara marble. Being one of the largest fabricators in our area, they have tons of remnant pieces. I found a piece large enough for two bathroom countertops plus leftover for 4 thresholds, only $300. But since I hadn't decided on a fabricator, I didn't plunk down the money. It looked like they had lots of remnants so hopefully I can find something there again as we get closer to actually needing it.
Another finish detail is window and door casing. We're going with a simple Craftsman style butt joint, but I want the header to stand proud of the side casing, so that means we have to find 5/4 stock for the header. I checked at HD and a couple of local lumberyards; they don't carry it. Will have to do more research.

Finally, I ordered a custom screen door from Martin's Screen Shop, a local business. Decided internet wasn't going to be worth it after the custom charges and shipping. I'm going to use the screen door for the walk-in pantry. I got the idea after seeing it in a magazine - that's how I get all of my ideas - beg, borrow, steal :-).
 Now I'm trying to figure out how to hinge it so it opens both ways. I'm telling you, anytime you try to do anything slightly out of the ordinary, it's 100 times more work. I may need a Plan B.
My friend Kathryn came down from SF and helped me choose paint colors. It is so much easier and of course so much more fun to have another person to bounce ideas off of. Oh, and did I mention Kathryn has really good design sense! Here's our initial stab. A lot of Benjamin Moore Historical colors, more muted and grayed, since we're going for a farmhouse style.
 I also went up to M. Teixiera and picked out a soapstone slab for our kitchen countertops and fireplace surround. That only took one hour! Then drove down the road to Fox Marble
to check out Carrara marble. Being one of the largest fabricators in our area, they have tons of remnant pieces. I found a piece large enough for two bathroom countertops plus leftover for 4 thresholds, only $300. But since I hadn't decided on a fabricator, I didn't plunk down the money. It looked like they had lots of remnants so hopefully I can find something there again as we get closer to actually needing it.
Another finish detail is window and door casing. We're going with a simple Craftsman style butt joint, but I want the header to stand proud of the side casing, so that means we have to find 5/4 stock for the header. I checked at HD and a couple of local lumberyards; they don't carry it. Will have to do more research.
Finally, I ordered a custom screen door from Martin's Screen Shop, a local business. Decided internet wasn't going to be worth it after the custom charges and shipping. I'm going to use the screen door for the walk-in pantry. I got the idea after seeing it in a magazine - that's how I get all of my ideas - beg, borrow, steal :-).
 Now I'm trying to figure out how to hinge it so it opens both ways. I'm telling you, anytime you try to do anything slightly out of the ordinary, it's 100 times more work. I may need a Plan B.
Week #27: Jan 8 - 14 Taping/Mudding
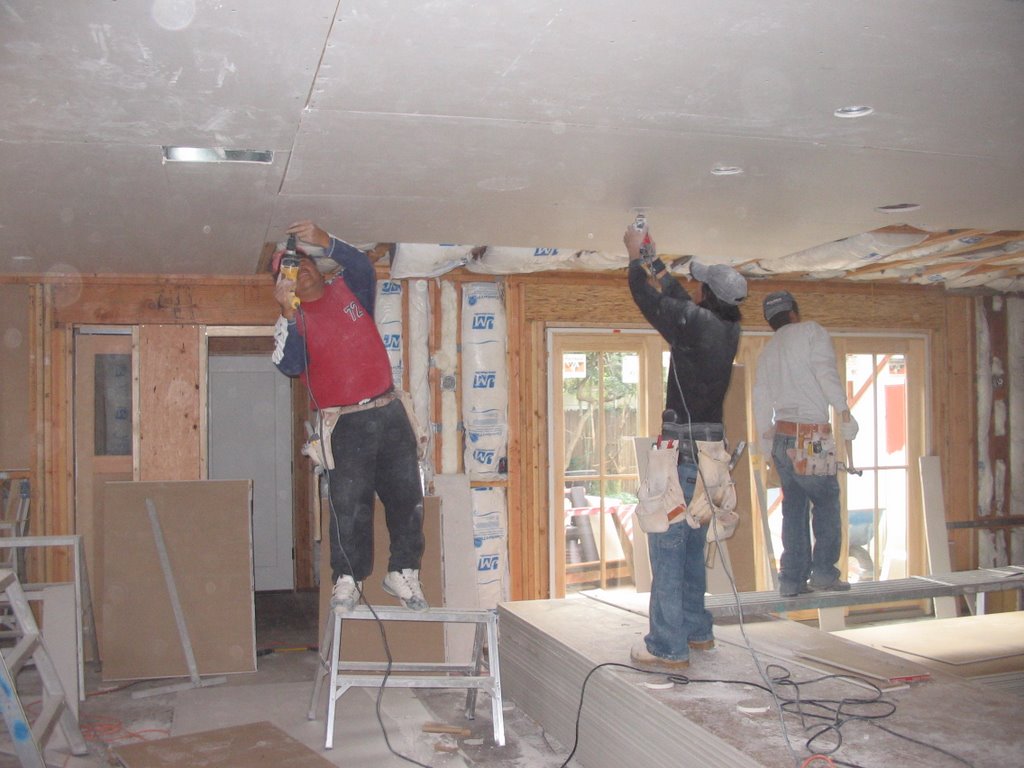
Last week was a great week! They finished hanging the sheetrock and I got an inspection Friday afternoon. Everything went very smoothly. We used 5/8" sheetrock on the Great Room ceiling and 1/2" on all the walls.
 For the shower and bathtub walls we used cement backer board with the 30lb felt paper behind it for added protection.

With all the drywall up, the house looks so much brighter; maybe I didn't need that skylight in the kitchen??
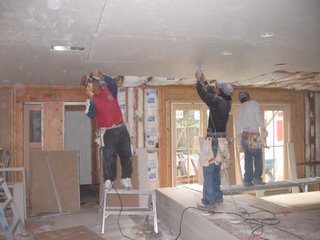
 Next up, the tapers and mudders. It's all about having the right equipment and tools!
 This guy's got a tool that dispenses tape and mud all in one stroke.
 Because of the cold weather, it's taking the mud a little longer to dry out, so they need to wait a day or two in between new applications of mud. But Juan's assured me we can start painting on 1/26.
 For the shower and bathtub walls we used cement backer board with the 30lb felt paper behind it for added protection.
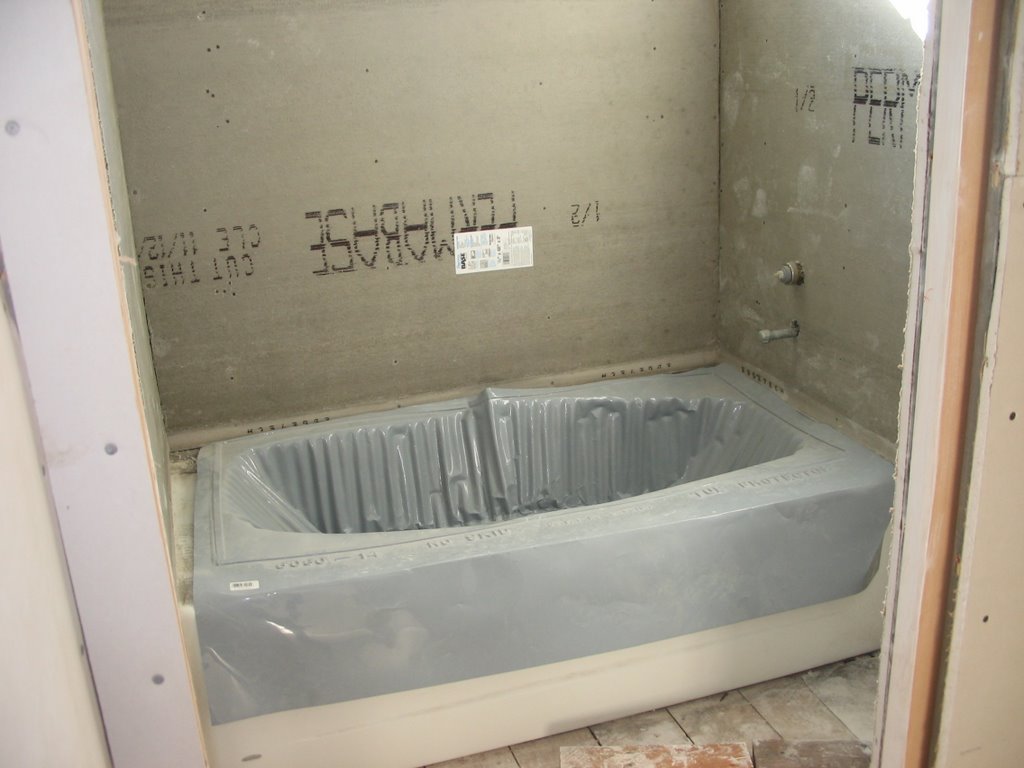
With all the drywall up, the house looks so much brighter; maybe I didn't need that skylight in the kitchen??
 Next up, the tapers and mudders. It's all about having the right equipment and tools!
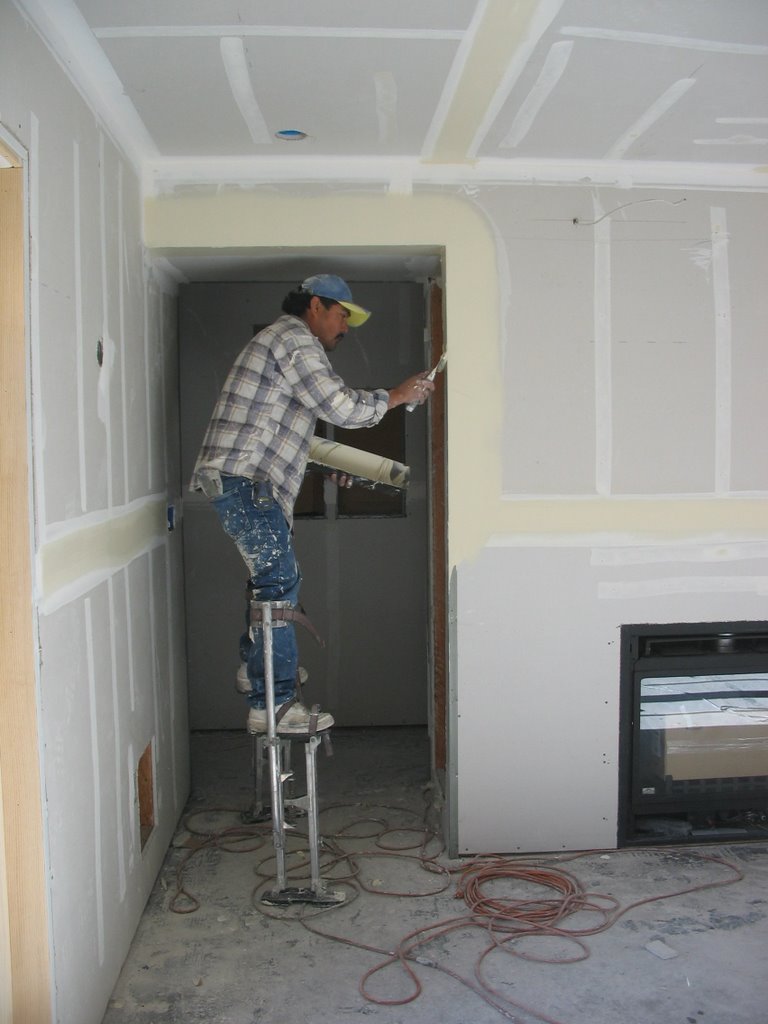 This guy's got a tool that dispenses tape and mud all in one stroke.
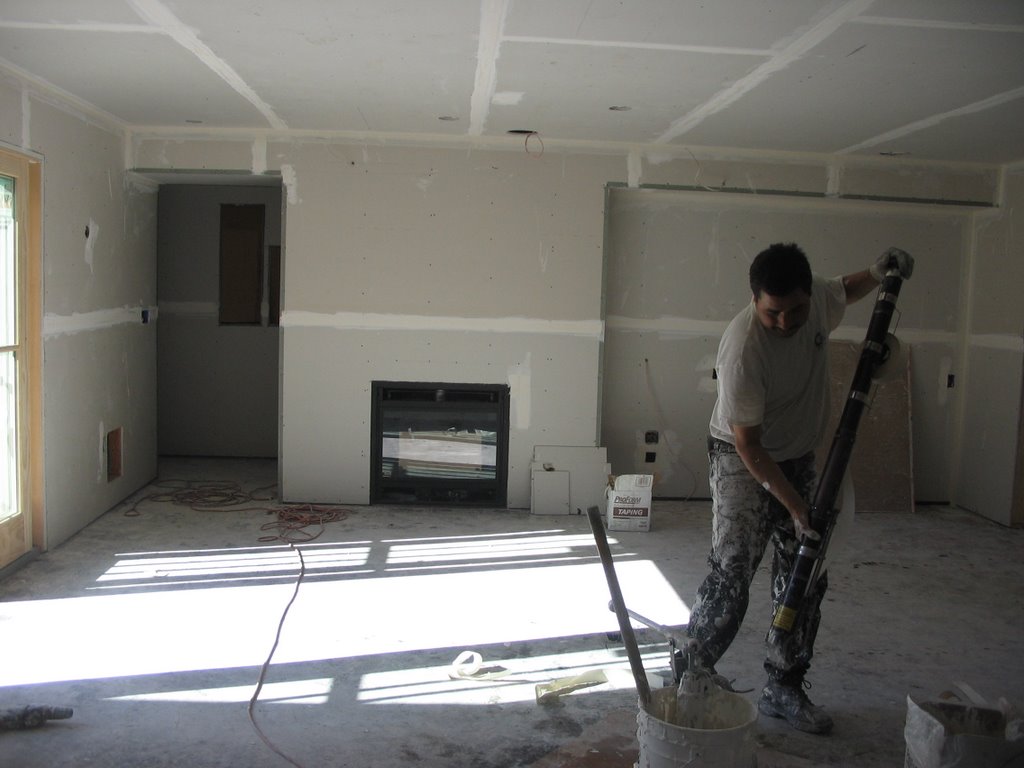 Because of the cold weather, it's taking the mud a little longer to dry out, so they need to wait a day or two in between new applications of mud. But Juan's assured me we can start painting on 1/26.
Week #26: Jan 1 - 7 Drywall
Happy New Year!
The next day, we were back at work. Lots of little punchlist items, but they had to be done before the walls got closed up. We had our handyman, Steve, come in and help us finish a couple of things, adding plywood boards in between the pocket door frames to strengthen it, drilling holes in the concrete subfloor (he had a more powerful hammer drill), fixing a sagging ceiling joist (from removing an old skylight).
 The plumber came in and connected and tested the bathtub drain, plus filled in their remaining holes with concrete.
Tristan went shopping for speakers so we'd have the templates marked on the ceiling.
 We put up 30lb felt paper on all the shower, bathtub walls as extra water proofing behind the cement backer board, which the drywallers will install. The gap at the bottom is where the hot mopping goes. I also scheduled the hot moppers to come next week so we can finish the shower pan and get our inspection.
 Steve and I were there till 8:30pm felt papering the bathtub walls which were complicated by the fact we had to add furring strips to bring the paper out level with the bathtub lip. Try as I do to think ahead and figure out how one decision affects the next, I've made my share of mistakes. For example, with the bathtub, I spent all night thinking about the ramifications of furring out the walls. I had bought bullnose tile to finish the tile/wall edge. But with the tub wall 1/2" proud of the rest of the walls, I would need to throw out the bullnose and instead buy quarter round tile. If I wanted to save the bullnose, I'd need to fur out all the rest of the bathroom walls. But that meant my toilet wouldn't be exactly 12" out from the wall which might be a problem for the water inlet connection. Gadzooks!
The next morning when the drywall crew showed up, I was still trying to figure out the best strategy and decided to remove the furring strips on the regular walls which meant buying new quarter round tile. Oh well. Thank goodness we screwed the furring strips in instead of nailing them.
When the drywall crew pointed out several areas where the framers did not leave a place to attach the drywall, I was quite proud of myself for being able to cut and attach additional blocking and framing so they could keep working, even if I did accidentally cut off a small corner of the sawhorse with my circular saw!
I think I've mentioned this before, but thank goodness for power tools! I mean forget the hammer; I can't drive a nail worth anything. That's why I was screwing everything in, so I could use the cordless drill. But once we get our cordless nail gun, watch out!
This week I finally pulled the trigger and ordered the cabinetry. I think originally I had planned to order them in November! See how far our schedule has slipped? I know it should be old hat by now, but the amount of detail in every aspect of this project still amazes me. With the cabinet order, even as I was signing the contract, I was rechecking dimensions and finding little errors. I just know when the cabinets come in, something is going to be amiss. And I'm not being a pessimist! I'm just being realistic!
Week #25; Dec 25 - 31 Insulation
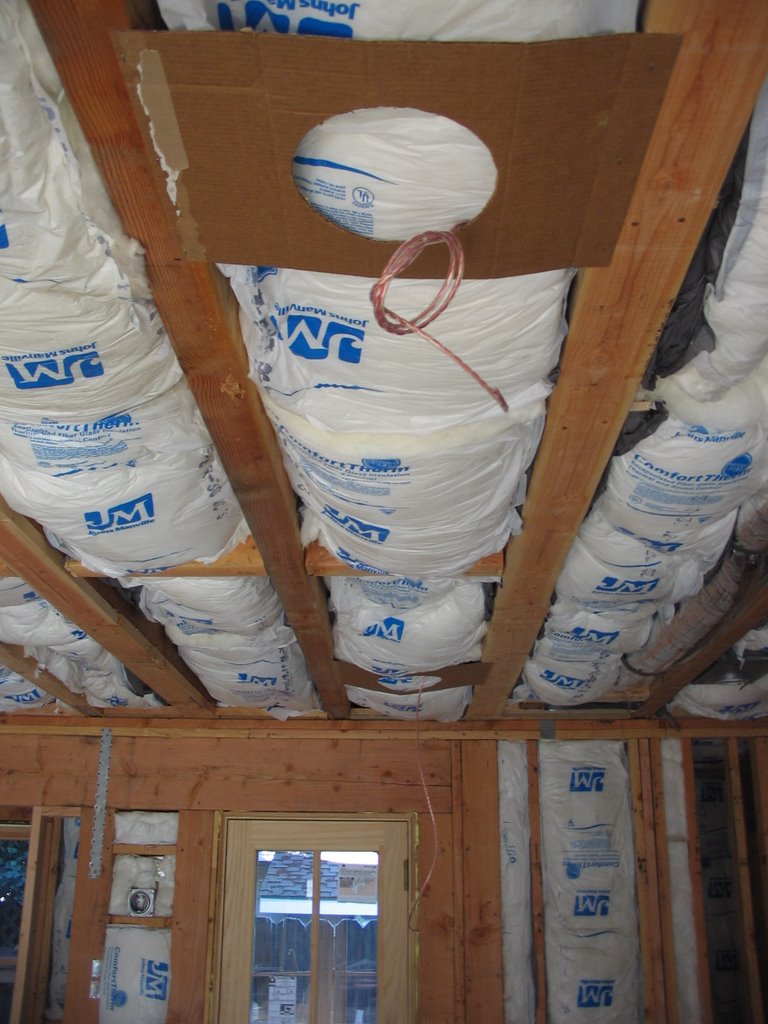
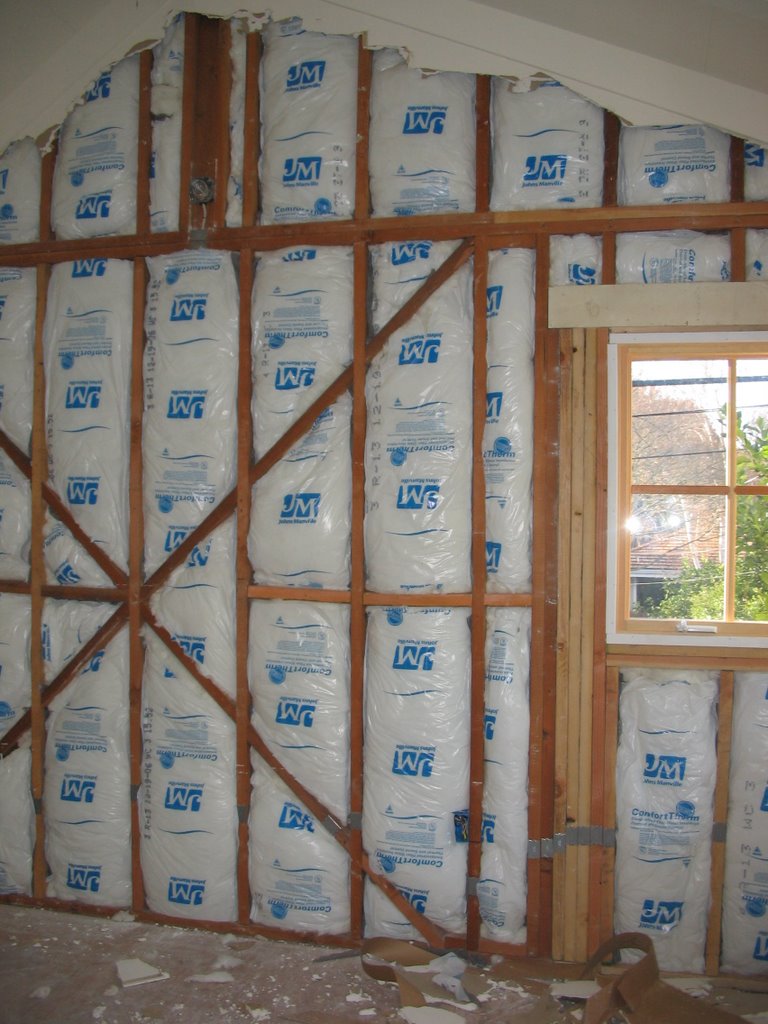 Now that we've passed rough-in, we can start to seal up the walls. But first gotta put in insulation. I got bids from 4 companies to install insulation in all of the ceilings and exterior walls, but none were working between Xmas and New Year. It wouldn't have been an issue but for the plumbing delays. Now, I really didn't want to have a week go by with nothing happening at the house. So one day, when I was at HD in the insulation aisle, I asked the two guys standing next to me if they knew anyone who installed insulation. "Yeah, sure!" Then I asked my fireplace installer if he knew anyone. "Yeah, sure!"
So, we ended up hiring Fidel, buying our own insulation and saving a ton. Buying the Johns Manville formaldehyde-free insulation at HD, combined with my 10% off coupon, saved me 40% on material costs. And this was another eye opener. I based my buy quantity on the companies' material estimates; at the end of the job, I had enough insulation left over to do all of our interior walls as well. And of course, we didn't lose a week on the schedule. All in all, we paid less and got more.

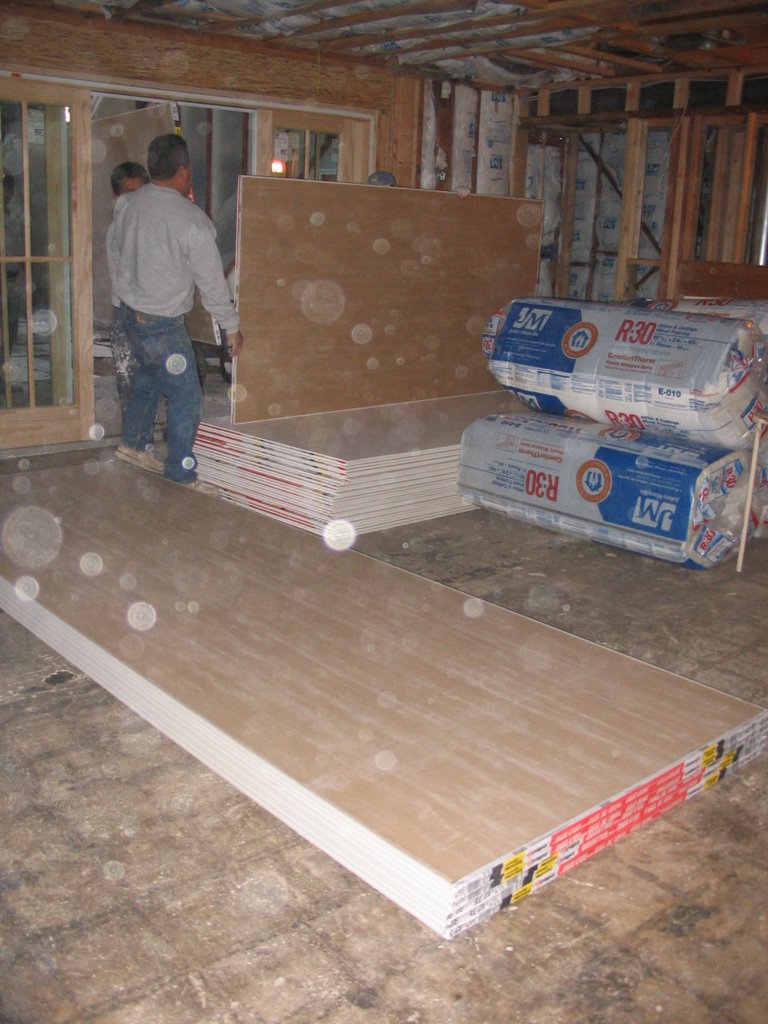
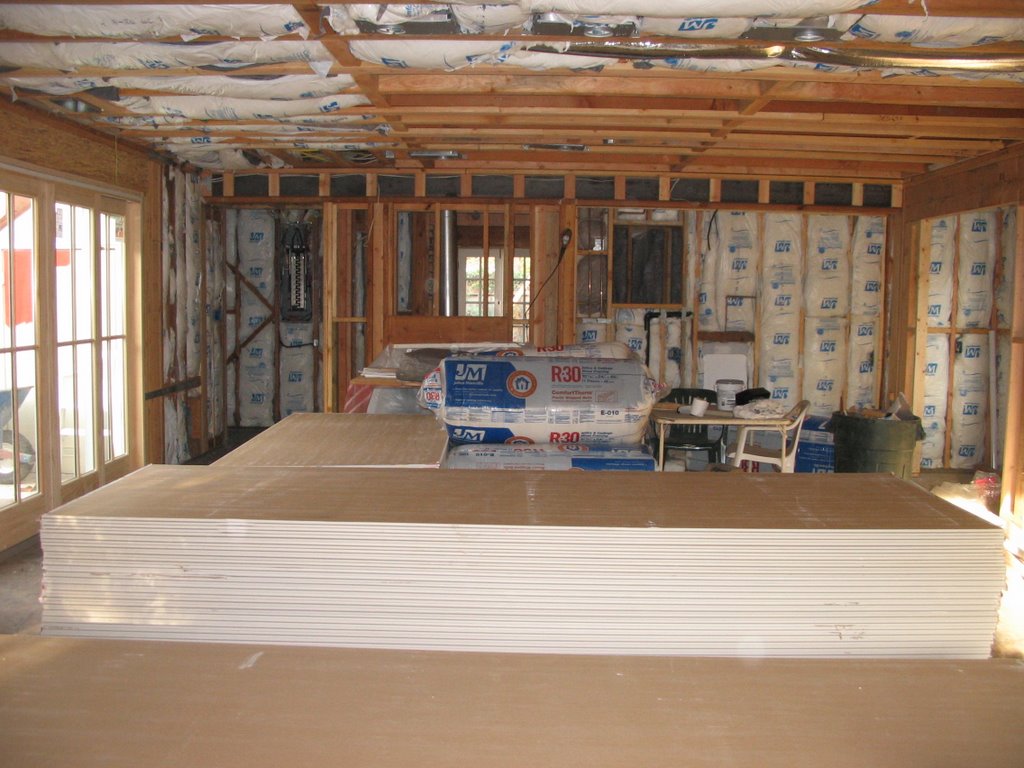
 Even before all of the insulation work had been completed, our drywall contractor stopped by and delivered the sheetrock. It really felt like things were moving!
 Finally this week, the electrician put in speaker wires (before the ceiling insulation went in) and Tristan and I installed a couple more pocket doors.
Week #24: Dec 18 - 24 Rough-in Inspections
The plumber didn't show up until 6am Monday to top the vents. He said he'd do it Friday or Saturday and to go ahead and schedule the inspection for Monday morning, which I of course I did. Now it's 8am, and the inspector's coming in 15 minutes and he can't stack the vents, which means there's a leak somewhere in the plumbing system.
So another failed plumbing inspection.
We had to have another house colonoscopy to find the leak. It turned out to be right in front of the house where the new waste line ties into the old cast iron going out to the street.
A large triangular piece of cast iron broke off right where the new and old pipes were joined. Why did it break? Depending on who you talk to it could have been bad job cutting the old pipe, bad job fitting the old to the new, forgetting to put some gravel underneath the pipes so the weight of all the dirt above wouldn't push and break the join, or just plain bad luck. Of course, the plumber liked the last reason.
Anyways, that meant Billy had to dig four feet down, redo the pipes, (including the double cleanout which was installed incorrectly with a deadspot), refill all the waste lines and I had to schedule another inspection.
Early the day of the reinspection, I decided to check the waste lines and found I had to run the hose for almost 15 minutes before the uppermost vent spilled over. That didn't seem right. I called the plumber and he agreed something was wrong. But again my inspection was looming with no time to investigate and fix. ?$%^@#?$$J%!
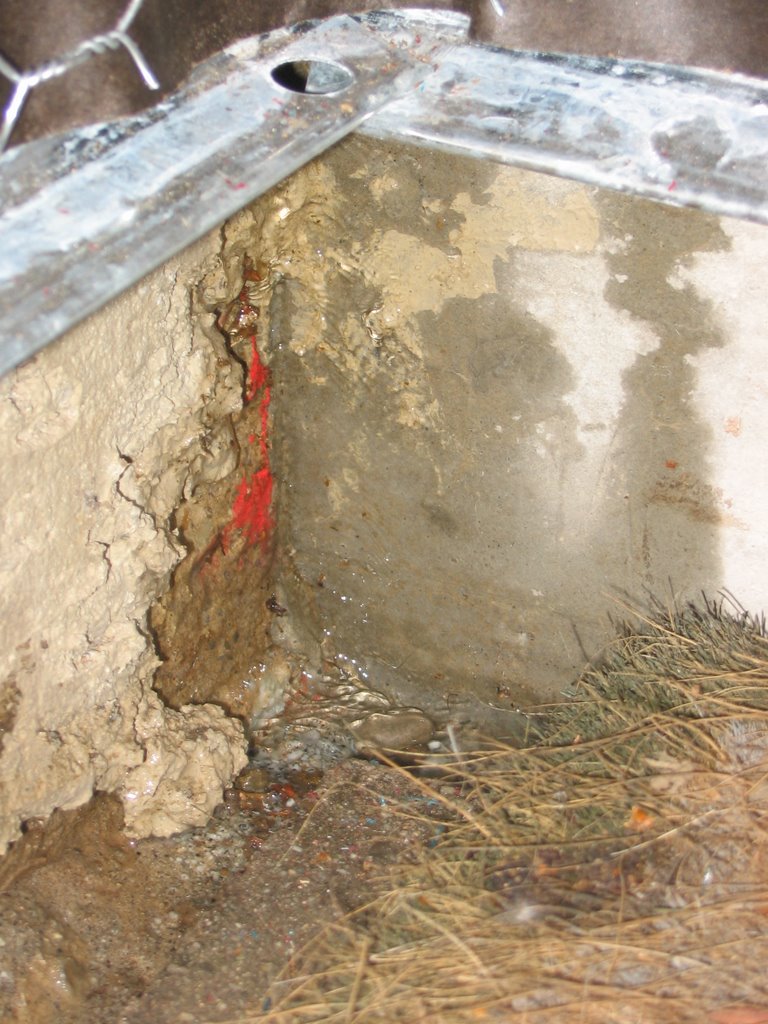
I kept topping off the vent and started walking around the house trying to find anything unusual. Lo and behold I noticed a dark spot on the sill plate right where the old kitchen sink drain used to be.


Yep, it was wet and on the outside wall you could see water trickling down the concrete foundation.

Soon afterwards, the inspector arrived. I topped off the vent stack for him and he seemed to be ok with that. He walked around the house looking at a few plumbing things, then chatted awhile before signing the permit card. He hadn't noticed the leak. It took us a little over 5 months, but we "passed" all of our rough-in inspections. I put passed in parentheses, because even though the inspector signed off, we still plan on fixing that leak. Most likely, we'll have to jackhammer thru the concrete subfloor right in the middle of the Great Room. Then, dig down to the old kitchen drain and sever it where it joins the main waste line. Better not mess around where the actual leak is since the sill plate and framing are all sitting right on top.
Again, a variety of possible reasons for the latest leak: 1) bad job capping the old drain line; 2) framer might have punctured the cap when installing the foundation bolts; 3) but then maybe the plumber didn't cut the old drain down far enough. The leak only showed up when all of the waste lines were filled. So if we never had a clogged up drain or backed up toilet, it wouldn't be an issue. But who can guarantee that?
So another failed plumbing inspection.
We had to have another house colonoscopy to find the leak. It turned out to be right in front of the house where the new waste line ties into the old cast iron going out to the street.
A large triangular piece of cast iron broke off right where the new and old pipes were joined. Why did it break? Depending on who you talk to it could have been bad job cutting the old pipe, bad job fitting the old to the new, forgetting to put some gravel underneath the pipes so the weight of all the dirt above wouldn't push and break the join, or just plain bad luck. Of course, the plumber liked the last reason.
Anyways, that meant Billy had to dig four feet down, redo the pipes, (including the double cleanout which was installed incorrectly with a deadspot), refill all the waste lines and I had to schedule another inspection.
Early the day of the reinspection, I decided to check the waste lines and found I had to run the hose for almost 15 minutes before the uppermost vent spilled over. That didn't seem right. I called the plumber and he agreed something was wrong. But again my inspection was looming with no time to investigate and fix. ?$%^@#?$$J%!
I kept topping off the vent and started walking around the house trying to find anything unusual. Lo and behold I noticed a dark spot on the sill plate right where the old kitchen sink drain used to be.


Yep, it was wet and on the outside wall you could see water trickling down the concrete foundation.
Soon afterwards, the inspector arrived. I topped off the vent stack for him and he seemed to be ok with that. He walked around the house looking at a few plumbing things, then chatted awhile before signing the permit card. He hadn't noticed the leak. It took us a little over 5 months, but we "passed" all of our rough-in inspections. I put passed in parentheses, because even though the inspector signed off, we still plan on fixing that leak. Most likely, we'll have to jackhammer thru the concrete subfloor right in the middle of the Great Room. Then, dig down to the old kitchen drain and sever it where it joins the main waste line. Better not mess around where the actual leak is since the sill plate and framing are all sitting right on top.
Again, a variety of possible reasons for the latest leak: 1) bad job capping the old drain line; 2) framer might have punctured the cap when installing the foundation bolts; 3) but then maybe the plumber didn't cut the old drain down far enough. The leak only showed up when all of the waste lines were filled. So if we never had a clogged up drain or backed up toilet, it wouldn't be an issue. But who can guarantee that?
Saturday, January 06, 2007
Week #23: Dec 11
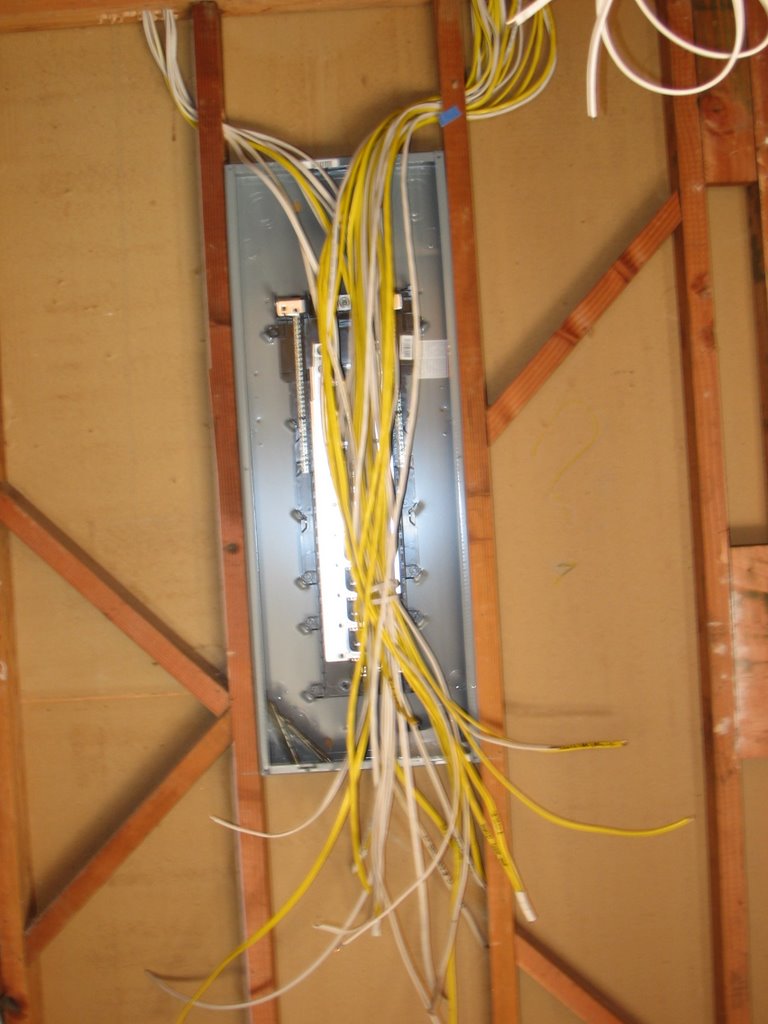
Clint worked late nights to finish the electrical work. Here's the BEFORE of the subpanel with the rat's nest of wires feeding in.

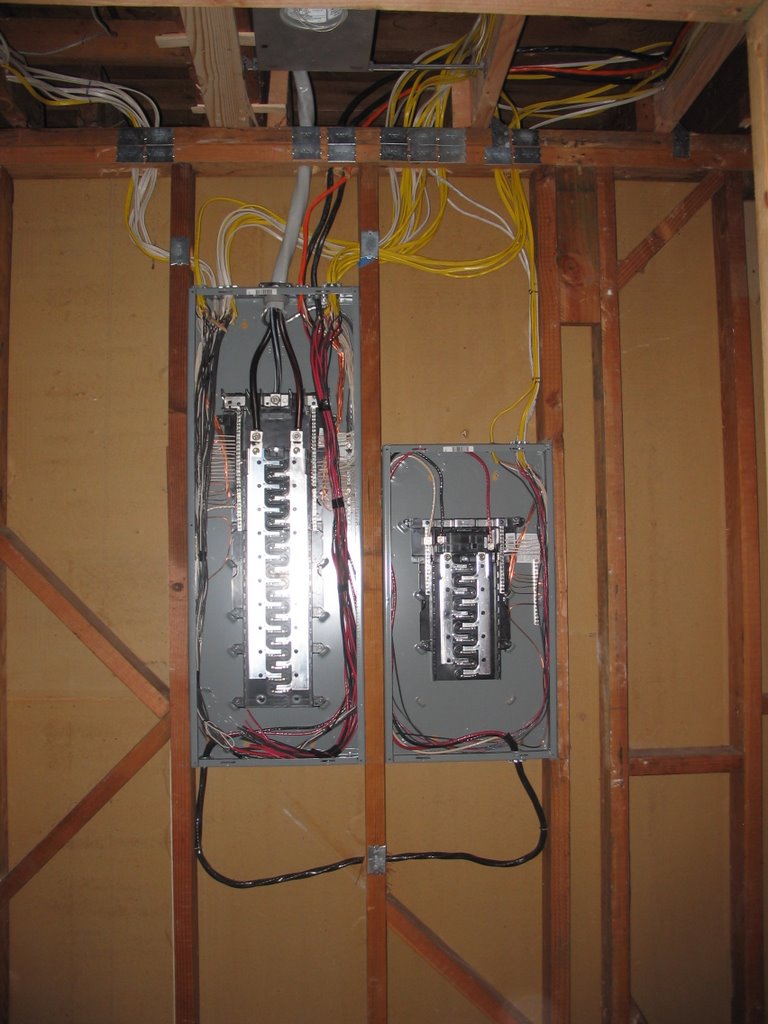
And the AFTER with all the wires going to their appropriate terminals:

He had to add another smaller subpanel because we had so many electrical circuits.

Finally, time for the BIG inspection! The good news: we passed electrical, framing and HVAC. The bad news, I didn't realize we had to have the drain, waste and vent (DWV) lines filled with water to show the inspector we had no leaks. Actually, the plumber should have known that. Later, I found out he was hoping they would only have to pass a running test (just having water run and drain thru the system). Soon, I was to find out why the city requires a stacked inspection.
So now, I had to get the plumber over to cap all but the highest vent stack, fill with water and get another inspection. Bummer.
And the AFTER with all the wires going to their appropriate terminals:

He had to add another smaller subpanel because we had so many electrical circuits.
Finally, time for the BIG inspection! The good news: we passed electrical, framing and HVAC. The bad news, I didn't realize we had to have the drain, waste and vent (DWV) lines filled with water to show the inspector we had no leaks. Actually, the plumber should have known that. Later, I found out he was hoping they would only have to pass a running test (just having water run and drain thru the system). Soon, I was to find out why the city requires a stacked inspection.
So now, I had to get the plumber over to cap all but the highest vent stack, fill with water and get another inspection. Bummer.
Week #22: Dec 4
Well, apparently nothing happened, since I can't seem to find a record log for this week. Actually, I know Clint was working mucho hours trying to wrap up the electrical. It's getting dark earlier now, so I bought a big halogen lamp to encourage longer working hours!
Steve worked on trimming the front door and garage door and got the remaining siding up.
My main job, as always, is cleaning up the place. When I signed up for the GC job, I didn't quite realize how much of my time would be spent sweeping, vaccuming, moving stuff around. I normally hate housekeeping, but it is something an unskilled laborer like me can do, as opposed to swinging a hammer. I don't have any strength. I need power tools! That's why I think we need to get a nail gun. Hint, hint.
Subscribe to:
Posts (Atom)